Melhores jogos de terror para jogar nesta temporada de Halloween
É a época assustadora do ano, então aqui estão alguns dos melhores jogos de terror que você pode jogar para se dar um bom susto.
The first area that all players start in after loading up Brighter Shores is Hopeport. Hopeport is a huge town with plenty of places for you to train your skills and level up. Este é o melhor guia para o Hopeport, cobrindo todas as informações necessárias para cada profissão, além de locais importantes de mapas para você saber.
O Hopeport tem cinco profissões em que os jogadores podem subir de nível. Esta é a primeira área em margens mais brilhantes, e você estará lá por um tempo antes de passar para o Hopeforest. Este guia foi projetado para equipá -lo com todas as informações necessárias para subir de nível em cada profissão - incluindo onde encontrar NPCs relacionados, áreas em que você pode treinar suas habilidades e até listas de todos os locais inimigos, receitas, peixes, itens de forragem e poções que você pode criar no jogo.
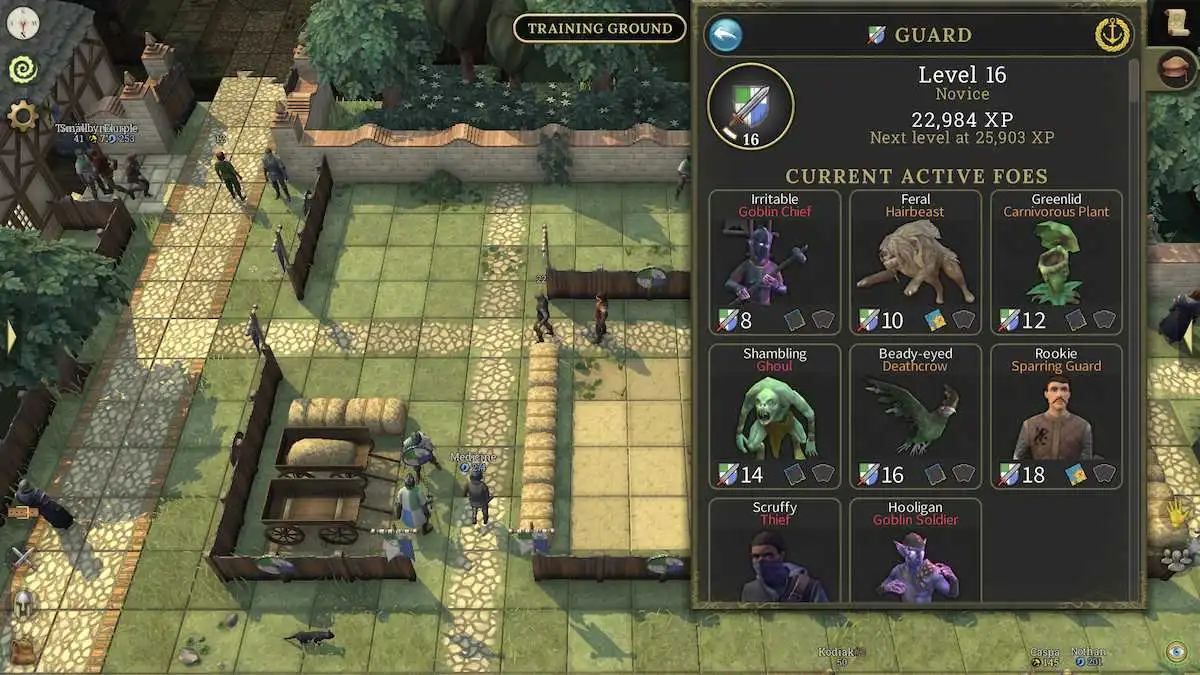
The Guard profession is the first combat role available in Brighter Shores, starting in the Chapter 1 zone of Hopeport. To start leveling up as a Guard, attack any enemy for the first time, whether it's a training dummy or a foe you encounter during the tutorial. Of course, you'll likely bite the dust if you try attacking an enemy before leveling up. Instead, head over to the Sparring Area (to the right of the Training Ground).
Leveling up as a Guard requires you to fight enemies near your level and upgrade your gear as consistently as possible. This will ensure that you can level up smoothly and prepare for tougher opponents. The Guard tab, symbolized by a sword and shield, shows you all of your potential enemy targets to help you track your progression.
Gear plays an important role in your success as a Guard. Gear drops from defeated enemies come in varying levels and rarities, with higher rarity gear providing a significant power boost. Equip one-handed, two-handed, and eventually ranged weapons as you progress, toggling between them during combat. However, keep in mind that any gear found in Hopeport only works effectively within Chapter 1 areas. Once you move to Hopeforest, you'll need to switch it up.
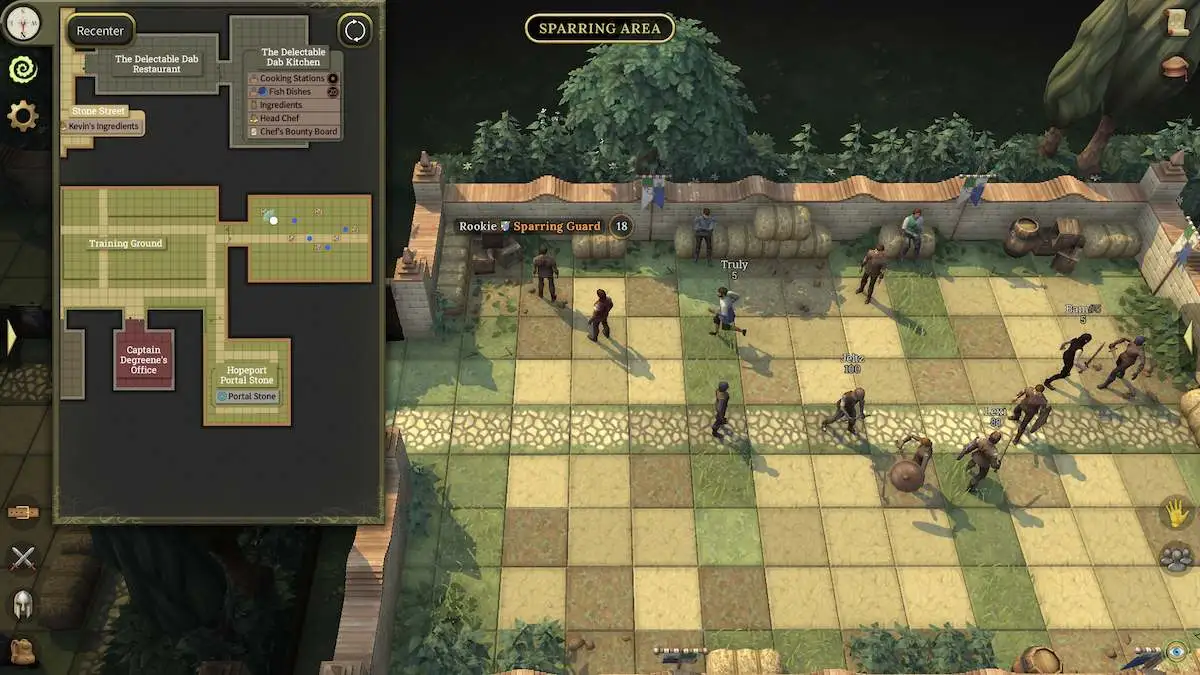
Para subir de nível sua profissão de guarda com eficiência, comece com sparring na área de sparring até chegar ao nível 6. Em seguida, passe a combater os corvos da morte de nível 6 na área da guarda para atingir o nível 8. Depois disso, você pode começar lutando contra os chefes de Goblin nas paredes sul para obter mais experiência, alternando com inimigos de pássaros próximos, se necessário. Como alternativa, você pode continuar brigando na área de sparring até o nível 10 e, em seguida, preencher a busca do Obelisk para aumentar o nível 13 ou 14 (dependendo do seu exp).
Utilizing XP potions that you craft through the Alchemist Profession can also help with your progress if you need a bit more of a boost. Embora o alquimista nivelado ao lado da Guarda possa ter tempo intensivo, é uma escolha estratégica para o acesso a essas poções benéficas, exigindo nivelamento de forragadores e coletores para a coleta de ingredientes.
Se você está procurando um método de nivelamento em ritmo mais lento depois de atingir o nível 20 na profissão de guarda, considere usar suas atividades passivas que desbloqueam nesse nível. These activities allow you to gain XP while offline, although at a slower rate compared to active combat.
The main locations you need for the Guard profession will take you all over Hopeport.
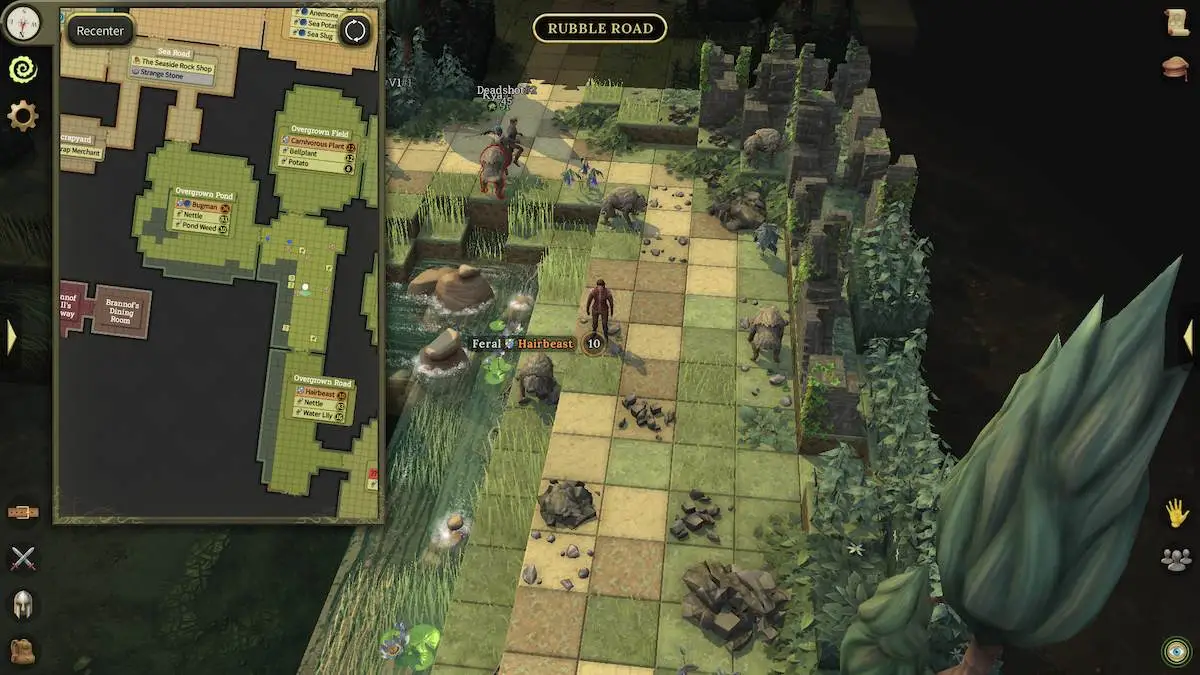
Os inimigos estão espalhados pela maior parte do Hookeport , com alguns ataques à vista (marcados por nomes vermelhos) e outros permanecendo passivos até ser provocados (marcados por nomes de laranja). No início do capítulo 1, os jogadores têm acesso ao feitiço de imunidade , o que impede o inimigo Aggro por um tempo limitado e pode até ajudar a escapar do combate. This status is also automatically granted after defeating aggressive enemies.
Personally, I liked training in the Sparring Area, as well as Rubble Road and the surrounding green areas there.
You can find enemies in these locations in Hopeport :
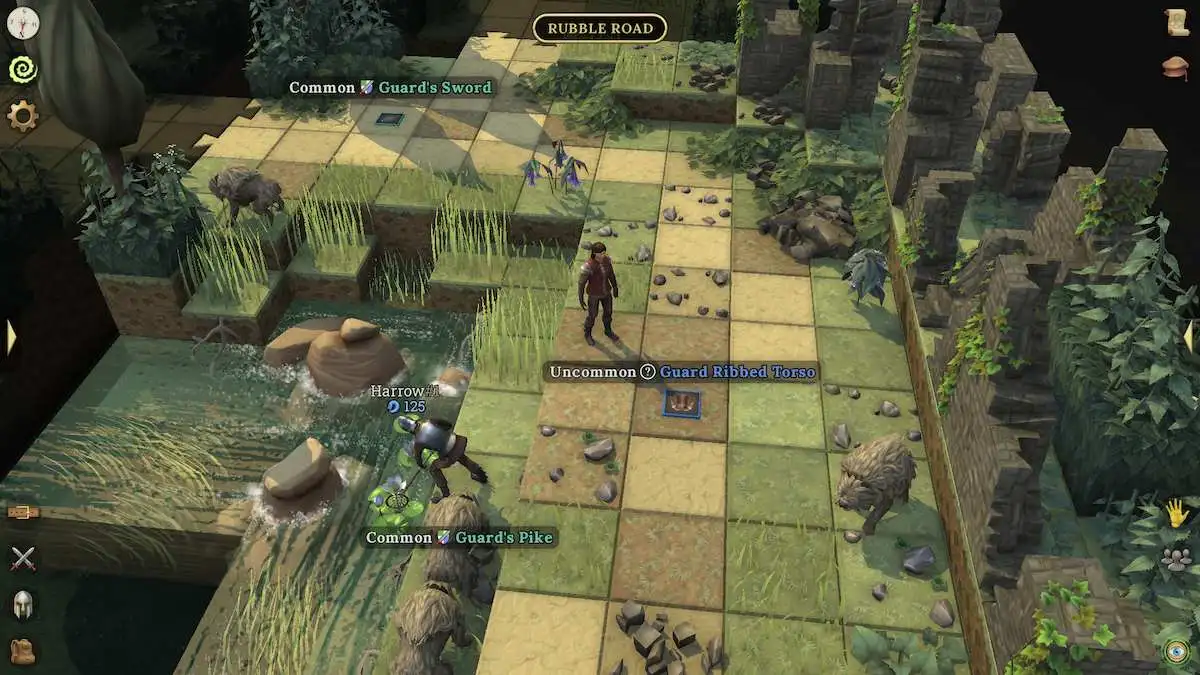
Gear that you can use for the Guard Professional is obtained through enemy drops , with the gear's level and rarity dictating its overall power. Legendary items, even if several levels lower, will often surpass the stats of common gear. Gerencie seu equipamento através da loja do intendente, perto dos campos de treinamento em Hopeport , onde você pode trocar ou vender equipamentos e desbloquear o feitiço do intendente para trocar de equipamento fora do combate.
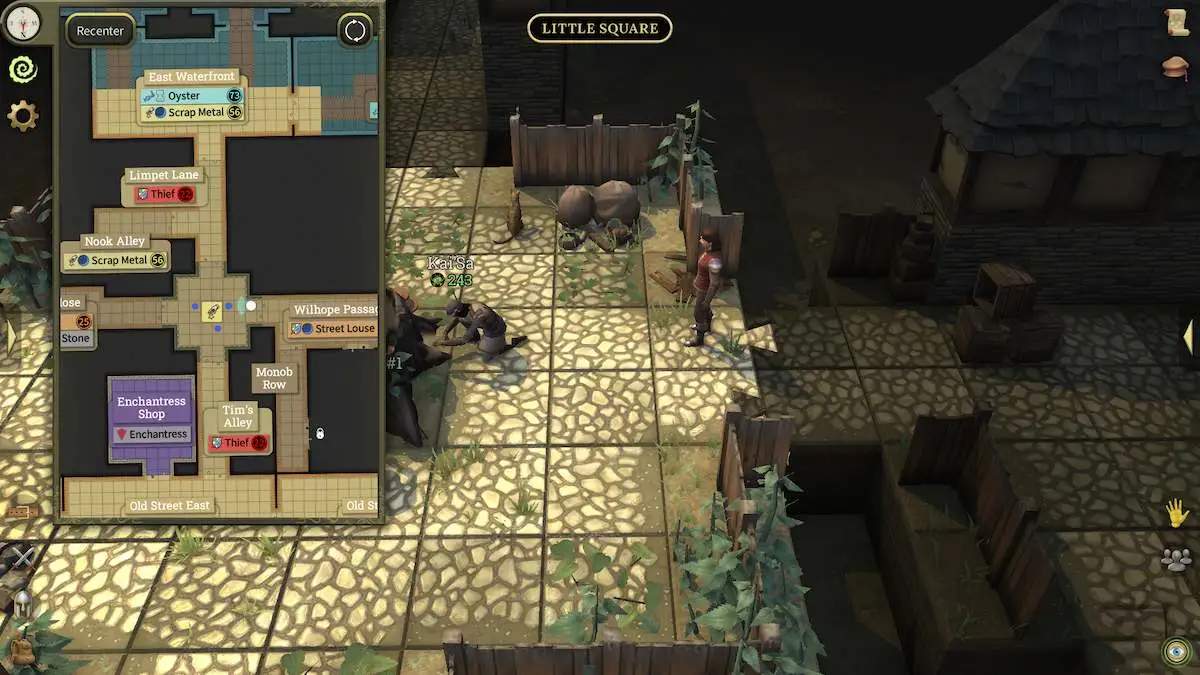
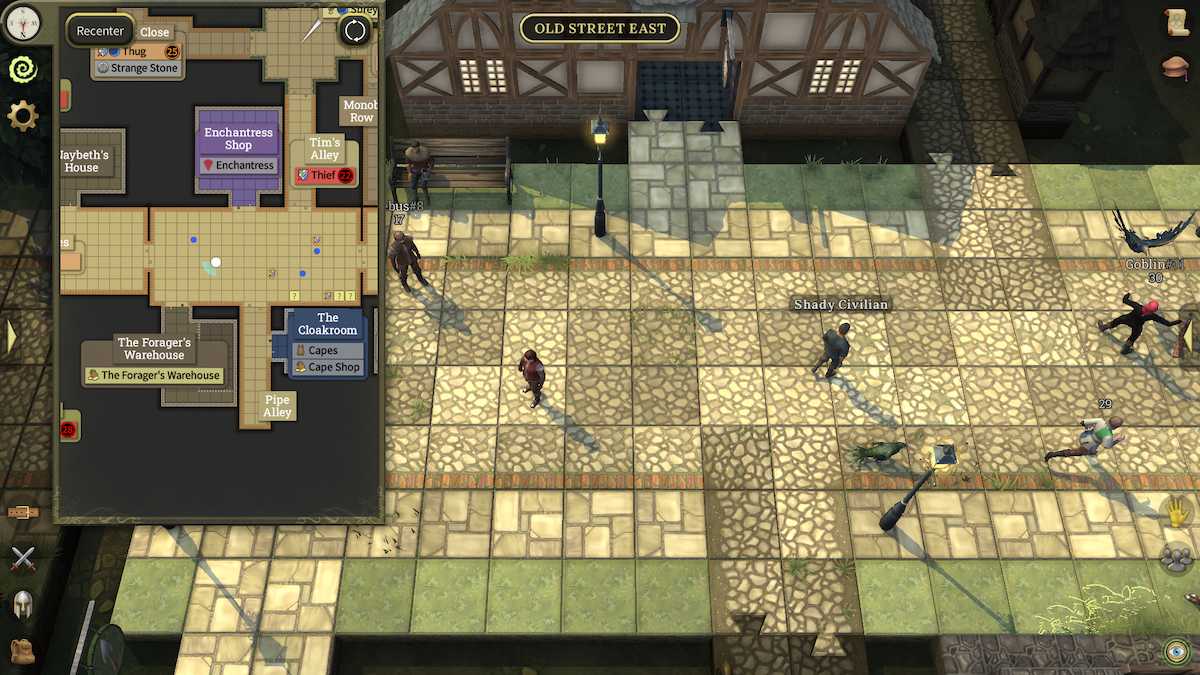
Enemies are marked on your map in red and orange . You can see in the screenshot above that my character is between two Theif locations - Tim's Alley and Limpet Lane. I'm also next to Wilhope Passage, which has more enemies. Enemies with red names will attack you first, enemies with orange names will wait for you to attack them.
| Nível | Inimigo | Location(s) |
|---|---|---|
| 0 | Recruit Sparring Guard | Sparring Area |
| 0 | Glinteye Deathcrow | Old Street East and Town Gates |
| 0 | Common Thief | Tim's Ally and Limpet Lane |
| 0 | Looter Goblin Soldier | North Walls |
| 0 | Feral Hairbeast | Overgrown Road and Rubby Road |
| 0 | Greenlid Carnivorous Plant | Fallen Monument and Overgrown Field |
| 10 | Beady-eyed Deathcrow | Old Street East and Town Gates |
| 12 | Rookie Sparring Guard | Sparring Area |
| 14 | Scruffy Thief | Tim's Ally and Limpet Lane |
| 16 | Hooligan Goblin | North Walls |
| 18 | Tangled Hairbeast | Overgrown Road and Rubby Road |
| 20 | Creepy Street Louse | Wilhope Passage |
| 22 | Bossy Goblin Chief | South Walls |
| 25 | Back Alley Thug | Murk Close |
| 28 | Snap Carnivorous Plant | Fallen Monument and Overgrown Field |
| 30 | Pearlcap Crab | East Beach |
| 33 | Foraging Ghoul | Collapsed Hovels and Wasteland |
| 36 | Primitive Bugman | Overgrown Pond |
| 39 | Tiderider Jellyfish | Jellyfish Landing |
| 41 | Wily Deathcrow | Old Street East and Town Gates |
| 44 | Drone Giant Ant | Cratera |
| 47 | Loitering Thief | Tim's Ally and Limpet Lane |
| 49 | Grumpy Pirate | Pirate Hideout |
| 52 | Patrol Sparring Guard | Sparring Area |
| 55 | Shabby Punkupine | Rocky Road |
| 58 | Scruffy Thug | Murk Close |
| 60 | Plunderer Goblin Soldier | North Walls |
| 63 | Large Crab | East Beach |
| 66 | Lumbering Hairbeast | Overgrown Road and Rubby Road |
| 69 | Blotchy Street Louse | Wilhope Passage |
| 71 | Leafjaw Carnivorous Plant | Fallen Monument and Overgrown Field |
| 74 | Hungry Bugman | Overgrown Pond |
| 77 | Robust Goblin Chief | South Walls |
| 79 | Orange Stinger Jellyfish | Jellyfish Landing |
| 82 | Ragged Pirate | Pirate Hideout |
| 85 | Slickwing Deathcrow | Old Street East and Town Gates |
| 88 | Soldier Giant Ant | Cratera |
| 90 | Pale Ghoul | Collapsed Hovels and Wasteland |
| 93 | Blue Scuttler Crab | East Beach |
| 96 | Shifty Thief | Tim's Ally and Limpet Lane |
| 99 | Striped Punkupine | Rocky Road |
| 101 | Loutish Thug | Murk Close |
| 104 | Raider Goblin Soldier | North Walls |
| 107 | Black Street Louse | Wilhope Passage |
| 110 | Wall Sparring Guard | Sparring Area |
| 112 | Scavenging Bugman | Overgrown Pond |
| 115 | Shaggy Hairbeast | Overgrown Road and Rubby Road |
| 118 | Yellow Drifter Jellyfish | Jellyfish Landing |
| 121 | Greedy Pirate | Pirate Hideout |
| 124 | Munching Carnivorous Plant | Fallen Monument and Overgrown Field |
| 126 | Bloodclaw Crab | East Beach |
| 129 | Authoritative Goblin Chief | South Walls |
| 132 | Amber Stripe Giant Ant | Cratera |
| 135 | Shadowy Deathcrow | Old Street East and Town Gates |
| 138 | Rowdy Thug | Murk Close |
| 140 | Neon Punkupine | Rocky Road |
| 143 | Crafty Thief | Tim's Ally and Limpet Lane |
| 146 | Ugly Bugman | Overgrown Pond |
| 149 | Marauder Goblin Soldier | North Walls |
| 152 | Cunning Pirate | Pirate Hideout |
| 155 | Crazed Ghoul | Collapsed Hovels and Wasteland |
| 157 | Copper Street Louse | Wilhope Passage |
| 160 | Verean Sparring Guard | Sparring Area |
| 163 | Man-o-Combat Jellyfish | Jellyfish Landing |
| 166 | Granite Shell Crab | East Beach |
| 169 | Hefty Hairbeast | Overgrown Road and Rubby Road |
| 171 | Prowler Giant Ant | Cratera |
| 174 | Bladefang Carnivorous Plant | Fallen Monument and Overgrown Field |
| 177 | Angry Thug | Murk Close |
| 180 | Vicious Deathcrow | Old Street East and Town Gates |
| 183 | Rugged Pirate | Pirate Hideout |
| 185 | Widejaw Bugman | Overgrown Pond |
| 188 | Fierce Goblin Chief | South Walls |
| 191 | Watchmen Punkupine | Rocky Road |
| 194 | Sneaky Thief | Tim's Ally and Limpet Lane |
| 197 | Fastvenom Jellyfish | Jellyfish Landing |
| 200 | Tropper Goblin Soldier | North Walls |
| 209 | Boulder Crab | East Beach |
| 218 | Angry Street Louse | Wilhope Passage |
| 227 | Prowling Ghoul | Collapsed Hovels and Wasteland |
| 236 | Tough Thug | Murk Close |
| 245 | Savage Hairbeast | Overgrown Road and Rubby Road |
| 254 | Treacherous Pirate | Pirate Hideout |
| 263 | Armsnapper Carnivorous Plant | Fallen Monument and Overgrown Field |
| 272 | Nightwarrior Giant Ant | Cratera |
| 281 | Hunter Bugman | Collapsed Hovels and Wasteland |
| 290 | Decorated Sparring Guard | Sparring Area |
| 299 | Giant Boulder Crab | East Beach |
| 308 | Malevolent Deathcrow | Old Street East and Town Gates |
| 317 | Black Jellyfish | Jellyfish Landing |
| 326 | Dangerous Thief | Tim's Ally and Limpet Lane |
| 335 | Heavy Punkupine | Rocky Road |
| 345 | Preeminent Goblin Chief | South Walls |
| 354 | Furious Street Louse | Wilhope Passage |
| 262 | Nefarious Pirate | Pirate Hideout |
| 372 | Warrior Goblin Soldier | North Walls |
| 381 | Elite Thug | Murk Close |
| 290 | Psychic Hairbeast | Overgrown Road and Rubby Road |
| 399 | Terrifying Bugman | Overgrown Pond |
| 408 | Frenzied Ghoul | Collapsed Hovels and Wasteland |
| 417 | Enormous Crab | East Beach |
| 426 | Goliath Giant Ant | Cratera |
| 435 | Bonecruncher Carnivorous Plant | Fallen Monument and Overgrown Field |
| 444 | Doom Jellyfish | Jellyfish Landing |
| 462 | Orange Tipped Punkupine | Rocky Road |
| 480 | Swashbuckling Pirate | Pirate Hideout |
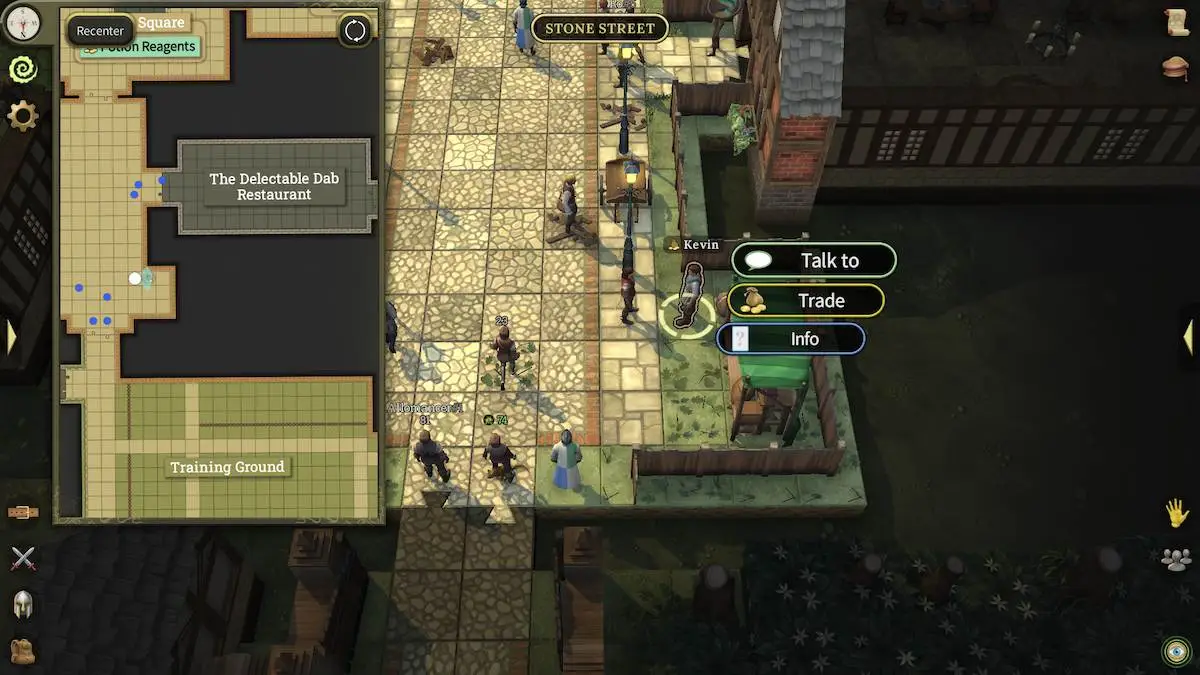
The Chef profession in Brighter Shores is a great moneymaking role. Os jogadores podem começar a nivelar o chef indo para a deliciosa cozinha Dab em Hopeport , situada do lado de fora do campo de treinamento e em frente ao farmacêutico na Stone Street . Esta cozinha bem equipada fornece acesso a várias estações de artesanato, cada uma designada para vários métodos de preparação de alimentos detalhados no livro de receitas ao lado da tabela de preparação.
Chefs can only sell their culinary creations for money, as food cannot be used in combat. No nível 9, os jogadores desbloqueiam o conselho de recompensas do chef, localizado na deliciosa cozinha DAB, que oferece tarefas de entrega de alimentos que concedem dinheiro e bônus Chef XP.
To level up the Chef profession effectively, you have a few options. O método mais simples envolve o foco em receitas de alto nível que requerem ingredientes coletados ou são feitos usando itens adquiridos na Kevin's Ingredients Shop . This shop is conveniently located outside The Delectable Dab on Stone Street and provides essential items for various recipes.
Para uma abordagem mais eficiente, considere nivelar o chef ao lado das profissões de Forager e Fisher, pois essas funções fornecem muitos dos ingredientes usados nas receitas do chef. Por exemplo, as muitas receitas de enguias geladas exigem gelatina (que você pode comprar da Kevin) e as enguias (que você pode pegar), tornando -a uma escolha lucrativa.
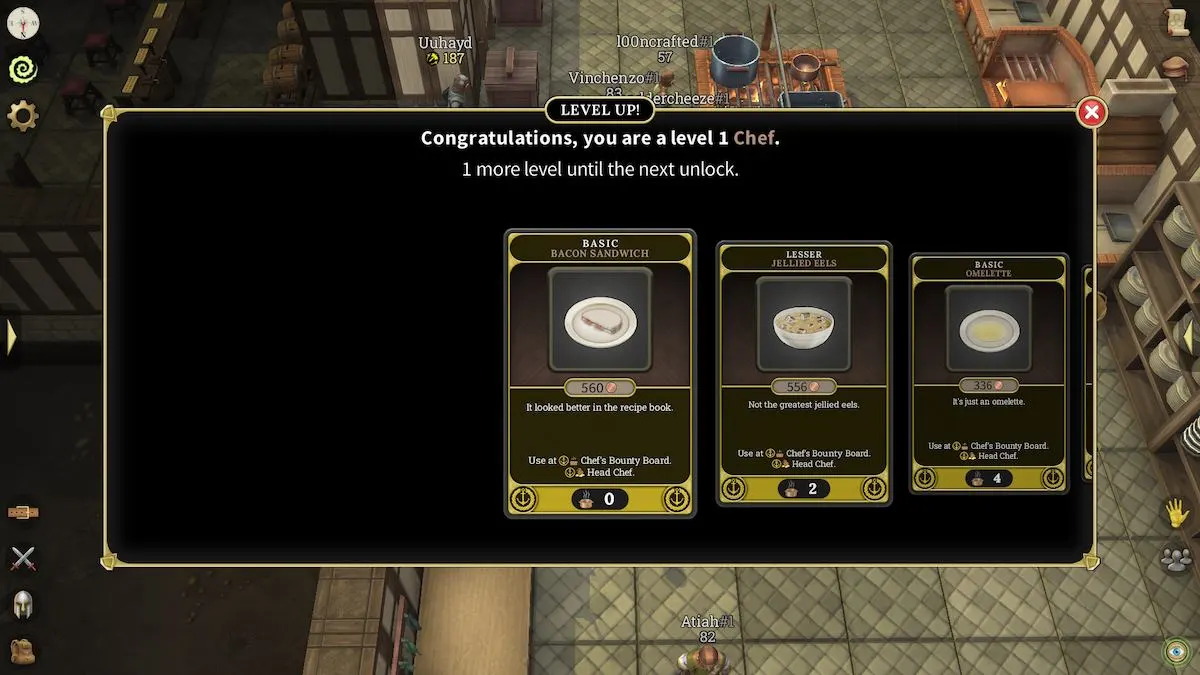
But, when you're starting out, you can just buy bacon and bread from Kevin to make yourself some Bacon Sandwiches .
Utilizing the Chef's Bounty Board at level 9 can significantly boost your progress. This board refreshes every hour and offers four rotating bounties that grant bonus XP and money when you deliver dishes to NPCs across Hopeport. It's worth checking these bounties regularly, even if you're leveling other professions.
The main location you need to know about for the Chef profession is The Delectable Dab Kitchen , but you won't spend all of your time there. To be an efficient Chef in Brighter Shores, you'll also need to know where to buy some ingredients for your recipes. Para ingredientes que você precisa pegar, consulte a lista de todos os peixes em margens mais brilhantes na parte inferior da seção da profissão de Fisher neste guia.
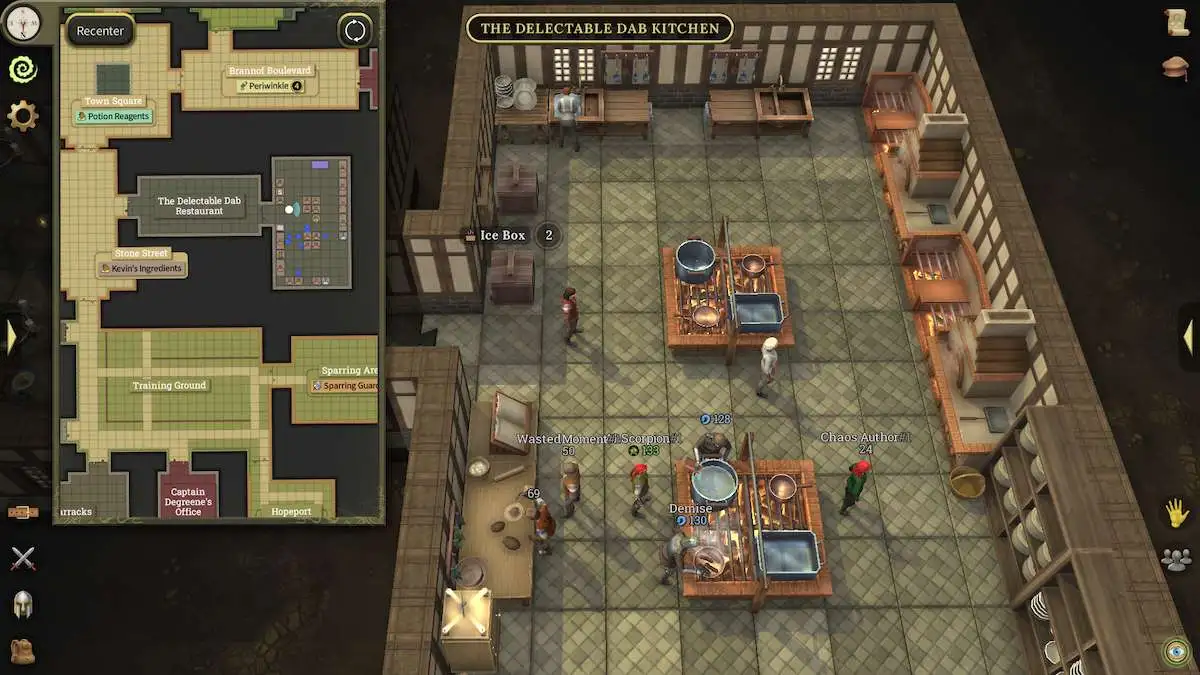
The Delectable Dab Kitchen is the place to be for all Chef-related activities. Equipped with preparation and cooking stations, the kitchen also has an ingredients bank for convenient storage of raw food items. Depois que os pratos são preparados, os jogadores podem vendê -los para o chef , um NPC dentro da cozinha que compra receitas concluídas, mas não vende nada em troca.
In the Delectable Dab Kitchen, you'll find the following cooking stations and prep areas :
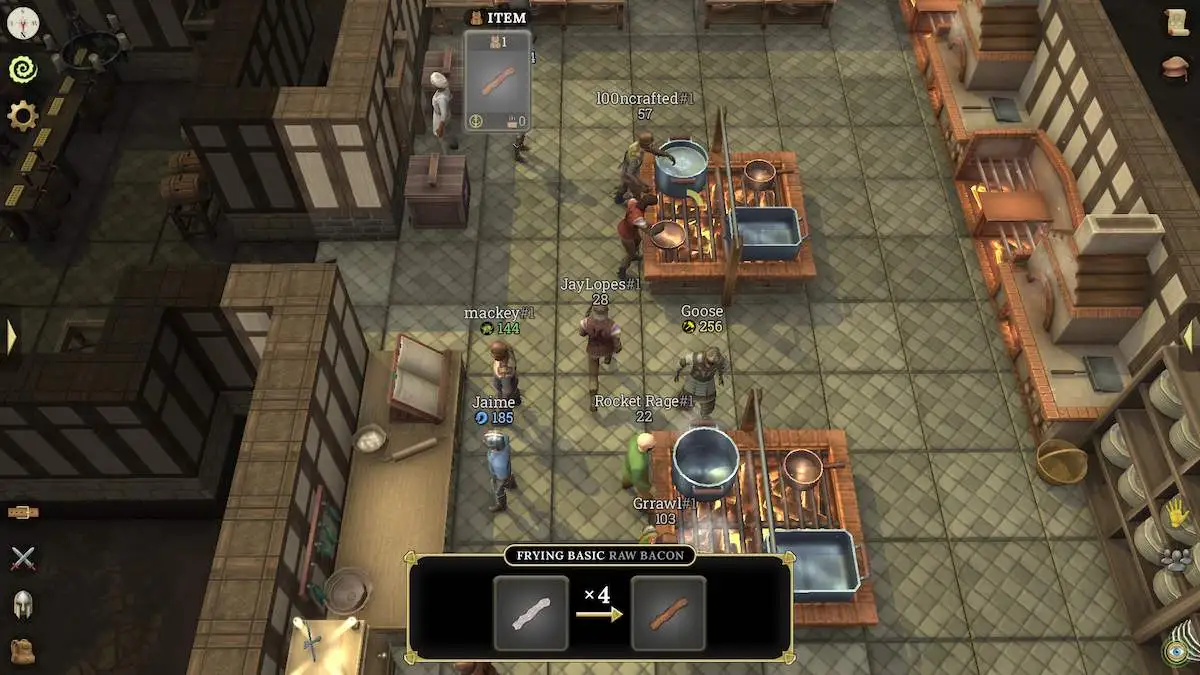
That's a really overwhelming list for Brighter Shores players who are just starting out. Thankfully, you only need to focus on the Chef Recipe Book , the Preparation Table , and the Frying Pan at first.
O uso de poções XP criado através da profissão de alquimista também pode melhorar os ganhos da experiência com as atividades do Chef, com a Poção de 5% de XP de Hookeport, mesmo afetando o XP de entrega de tarefas de recompensa. Os jogadores que visam maximizar a progressão do chef devem equilibrar as tarefas de coleta de ingredientes, preparação de pratos e quadro de recompensas para subir de nível de nível de maneira rápida e eficiente.

The table of recipes below includes the passive recipes that you can create in Brighter Shores. There are five passive recipes, and each includes a fish as the main part of the recipe - or the whole recipe in some cases. The passive recipes are:
| Nível | Receita | Ingredientes |
|---|---|---|
| 0 | Basic Bacon Sandwich | Basic Raw Bacon,Bread |
| 2 | Lesser Jellied Eels | Lesser Eel,Gelatin |
| 4 | Basic Omelette | Basic Eggs |
| 6 | Basic Sausage and Mash | Piper Potato, Raw Sausages |
| 8 | Basic Vegetable Stew | Basic Mixed Vegetables |
| 10 | Gray Jellied Eels | Gray Eel,Gelatin |
| 12 | Appetizing Bacon Sandwich | Appetizing Raw Bacon,Bread |
| 14 | Basic Chicken and Leek Pie | Valent Leek,Raw Chicken,Pastry |
| 16 | Yellowtail Gurnard Soup | Yellowtail Gurnard,Stock |
| 18 | Appetizing Sausage and Mash | King Phelwan Potato,Raw Sausages |
| 20 | Common Dab Stew | Common Dab |
| 22 | Rocky Jellied Eels | Rocky Eel, Gelatin |
| 25 | Appetizing Vegetable Stew | Appetizing Mixed Vegetables |
| 27 | Spotted Mackibut on Toast | Spotted Mackibut, Golbranth Beetroot |
| 30 | Appetizing Chicken and Leek Pie | Banded Leek,Pastry,Raw chicken |
| 32 | Placid Grilled Bass | Placid Bass |
| 35 | Ridged Garlic Herring | Ridged Herring, Deepside Garlic |
| 38 | Fine Bacon Sandwich | Fine Raw Bacon,Bread |
| 40 | Idle Roasted Sturlet | Idle Sturlet |
| 43 | Rord Jellied Eels | Rord Eel,Gelatin |
| 45 | Appetizing Lobster Thermidor | Orange Lobster,Cream,Butter,Wine |
| 48 | Leathery Baked Bream | Leathery Bream |
| 50 | Common Fried Ray Wings | Common Ray |
| 53 | Small Dab Stew | Small Dab |
| 56 | Fine Chicken and Leek Pie | Pineshade Leek,Raw Chicken,Pastry |
| 58 | Whitespot Mackibut on Toast | Whitespot Mackibut, Tarang Beetroot |
| 61 | Bigeye Gurnard Soup | Bigeye Gurnard,Stock |
| 63 | Fine Vegetable Stew | Fine Mixed Vegetables |
| 66 | Gray Garlic Herring | Gray Herring, Firevein Garlic |
| 68 | Appetizing Omelette | Appetizing Eggs |
| 71 | Flathead Roasted Sturlet | Flathead Sturlet |
| 74 | Beach Oysters with Lemon Juice | Beach Oyster,Lemon Juice |
| 76 | Fine Sausage and Mash | Calystra Potato,Raw Sausages |
| 79 | Bluejack Mackibut on Toast | Bluejack Mackibut, Kalb Beetroot |
| 81 | Moray Jellied Eels | Moray Eel,Gelatin |
| 84 | Black Baked Bream | Black Bream |
| 86 | Tasty Chicken and Leek Pie | Glint Leek,Raw Chicken,Pastry |
| 89 | Dim Fried Ray Wings | Dim Ray |
| 92 | Dancing Dab Stew | Dancing Dab |
| 94 | Tasty Bacon Sandwich | Tasty Raw Bacon,Bread |
| 97 | Striped Roasted Sturlet | Striped Sturlet |
| 99 | Striped Grilled Bass | Striped Bass |
| 102 | Basic Cod and Chips | Slight Cod,Piper Potato |
| 104 | Red Garlic Herring | Red Herring, Langard Garlic |
| 107 | Blackfin Gurnard Soup | Blackfin Gurnard,Stock |
| 110 | Streaked Mackibut on Toast | Streaked Mackibut, Flexhair Beetroot |
| 112 | Fine Lobster Thermidor | Striped Lobster,Cream,Butter,Wine |
| 115 | Soldier Fried Ray Wings | Soldier Ray |
| 117 | Surf Baked Bream | Surf Bream |
| 120 | Tasty Vegetable Stew | Tasty Mixed Vegetables |
| 123 | Thick Lipped Roasted Sturlet | Thick Lipped Sturlet |
| 125 | Tasty Sausage and Mash | Colawan Potato,Raw Sausages |
| 128 | Summer Dab Stew | Summer Dab |
| 131 | Appetizing Cod and Chips | Waltzing Cod,King Phelwan Potato |
| 133 | Signal Oysters with Lemon Juice | Signal Oyster,Lemon Juice |
| 136 | Horse Mackibut on Toast | Horse Mackibut, Zing Beetroot |
| 139 | Conger Jellied Eels | Conger Eel,Gelatin |
| 141 | Ochre Garlin Herring | Ochre Herring, Shelkram Garlic |
| 144 | Tasty Omelette | Tasty Eggs |
| 147 | Nimble Fried Ray Wings | Nimble Ray |
| 149 | Wandering Roasted Sturlet | Wandering Sturlet |
| 152 | Emerald Grilled Bass | Emerald Bass |
| 155 | Chub Mackibut on Toast | Chub Mackibut, Oldclay Beetroot |
| 157 | Delicious Sausage and Mash | Bitterbide Potato,Raw Sausages |
| 160 | Shiny Gurnard Soup | Shiny Gurnard,Stock |
| 162 | Smooth Dab Stew | Smooth Dab |
| 165 | Fine Cod and Chips | Teal Cod, Calystra Potato |
| 168 | Graceful Baked Bream | Graceful Bream |
| 170 | Delicous Bacon Sandwich | Delicious Raw Bacon, Bread |
| 173 | Leopard Jellied Eels | Leopard Eel, Gelatin |
| 176 | Wishful Garlic Herring | Wishful Herring, Grotto Garlic |
| 178 | Dropthe Grilled Bass | Dropthe Bass |
| 181 | Silver Roasted Sturlet | Silver Sturlet |
| 184 | Delicious Lobster Thermidor | Ghost Lobster,Cream,Butter,Wine |
| 186 | Blue Mackibut on Toast | Blue Mackibut, Furtop Beetroot |
| 189 | Tiger Fried Ray Wings | Tiger Ray |
| 192 | Speckled Oysters with Lemon Juice | Speckled Oyster, Lemon Juice |
| 194 | Cream Baked Bream | Cream Bream |
| 197 | Delicious Chicken and Leek Pie | Wonderous Leek,Raw Chicken,Pastry |
| 200 | Western Roasted Sturlet | Western Sturlet |
| 208 | Tasty Cod and Chips | Pearly Cod, Colawan Potato |
| 217 | Delicious Vegetable Stew | Delicious Mixed Vegetable |
| 225 | Screaming Ab Dab Stew | Screaming Ab Dab |
| 234 | Torpedo Gurnard Soup | Torpedo Gurnard, Stock |
| 242 | Wahoo Mackibut on Toast | Wahoo Mackibut, Olgrave Beetroot |
| 251 | Broad Fried Ray Wings | Broad Ray |
| 259 | Delicious Cod and Chips | Mosaic Cod, Bitterbide Potato |
| 268 | Hope Garlic Herring | Hope Herring, Amberflesh Garlic |
| 276 | Delicious Omelette | Delicious Eggs |
| 285 | Blond Roasted Sturlet | Blond Sturlet |
| 293 | Greater Jellied eels | Greater Eel, Gelatin |
| 303 | Giant Grilled Bass | Giant Bass |
| 310 | Gilt-headed Baked Bream | Gilt-headed Bream |
| 319 | Gourmet Lobster Thermidor | Cunning Lobster,Cream,Butter,Wine |
| 327 | Spotted Dab Stew | Spotted Dab |
| 336 | Gourmet Sausage and Mash | Greengrail Potato,Raw Sausages |
| 345 | Gourmet Bacon Sandwich | Gourmet Raw Bacon, Bread |
| 353 | Etway Mackibut on Toast | Etway Mackibut, Volbarn Beetroot |
| 362 | Sumptuous Cod and Chips | Burly Cod,Greengrail Potato |
| 370 | Shimmering Garlic Herring | Shimmering Herring, Weldbulb Garlic |
| 379 | Unicorn Puffer Sashimi | Unicorn Pufferfish,Soy Sauce |
| 387 | Bullet Roasted Sturlet | Bullet Sturlet |
| 396 | Jade Fried Ray Wings | Jade Ray |
| 404 | Rusty Oysters with Lemon Juice | Rusty Oyster, Lemon Juice |
| 413 | Brilliant Baked Bream | Brilliant Bream |
| 421 | Grand Gurnard Soup | Grand Gurnard |
| 430 | King Mackibut on Toast | King Mackibut, Jamato Beetroot |
| 438 | Gourmet Vegetable Stew | Gourmet Mixed Vegetable |
| 447 | Gourmet Chicken and Leek Pie | Golden Leek,Raw Chicken,Pastry |
| 455 | Mighty Dab Stew | Mighty Dab |
| 464 | Gourmet Cod and Chips | Emperor Cod, Galimeer Potato |
| 472 | Mighty Roasted Sturlet | Mighty Sturlet |
| 481 | Prime Fried Ray Wings | Prime Ray |
| 490 | Gourmet Omelette | Gourmet Eggs |
The Fisher profession in Brighter Shores involves catching various fish using different tools as you progress in levels. This gathering profession is essential for collecting ingredients used in Chef recipes and can also be a good source of profit. Players need specific tools, such as a Fishing Spear or a Fishing Rod, to catch fish effectively.

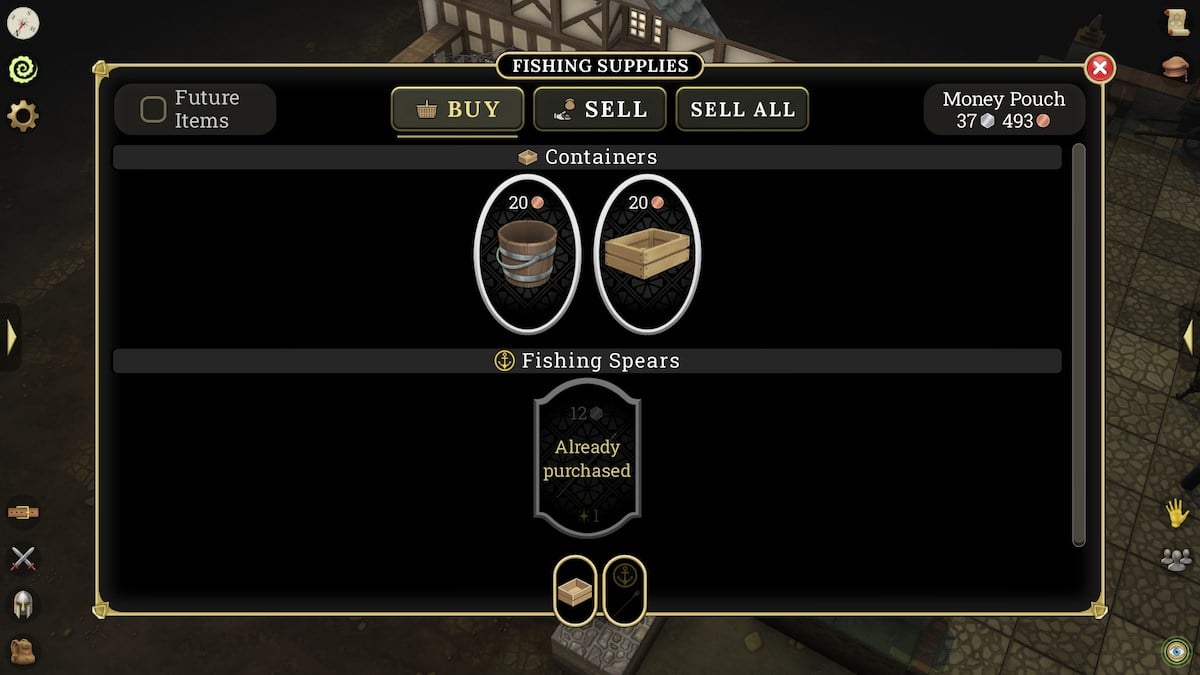
To begin your journey as a Fisher, you'll need to purchase a Level 1 Fishing Spear . Head to Melv's Fishing Supplies , located east of the Town Square in Hopeport, just south of the Guard HQ. The spear costs 12 Silver and is essential for catching your first fish.
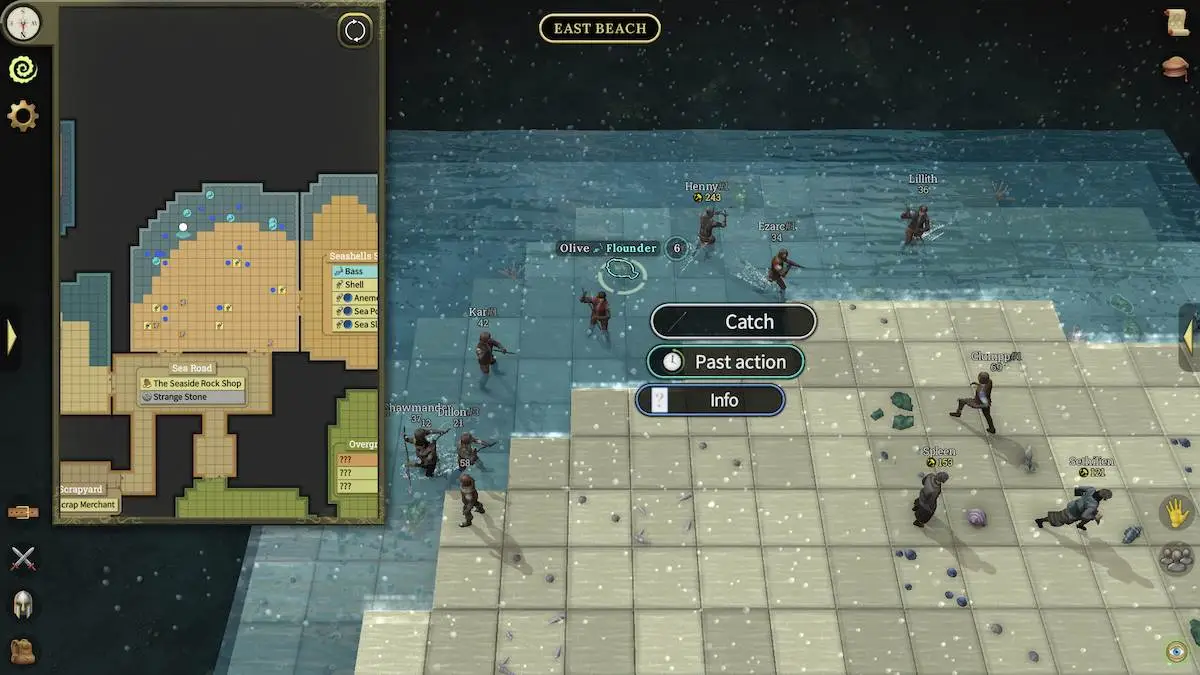
With the Fishing Spear in hand, you can catch fish in shallow rivers by clicking on the fish and selecting “Catch.” Fish in these areas spawn in groups of six, and you can catch up to four sets before needing to clear your inventory.
At level 20 , you can upgrade to Fishing Rods , which allow for passive fishing with the appropriate bait. Esse método é mais conveniente, pois requer menos movimento, permitindo que você obtenha o Fisher XP enquanto estiver offline, desde que você tenha isca suficiente estocada.
Para sua profissão de Fisher, você passará muito tempo na costa de Hopeport, mas há alguns outros locais importantes do mapa que você precisa conhecer.
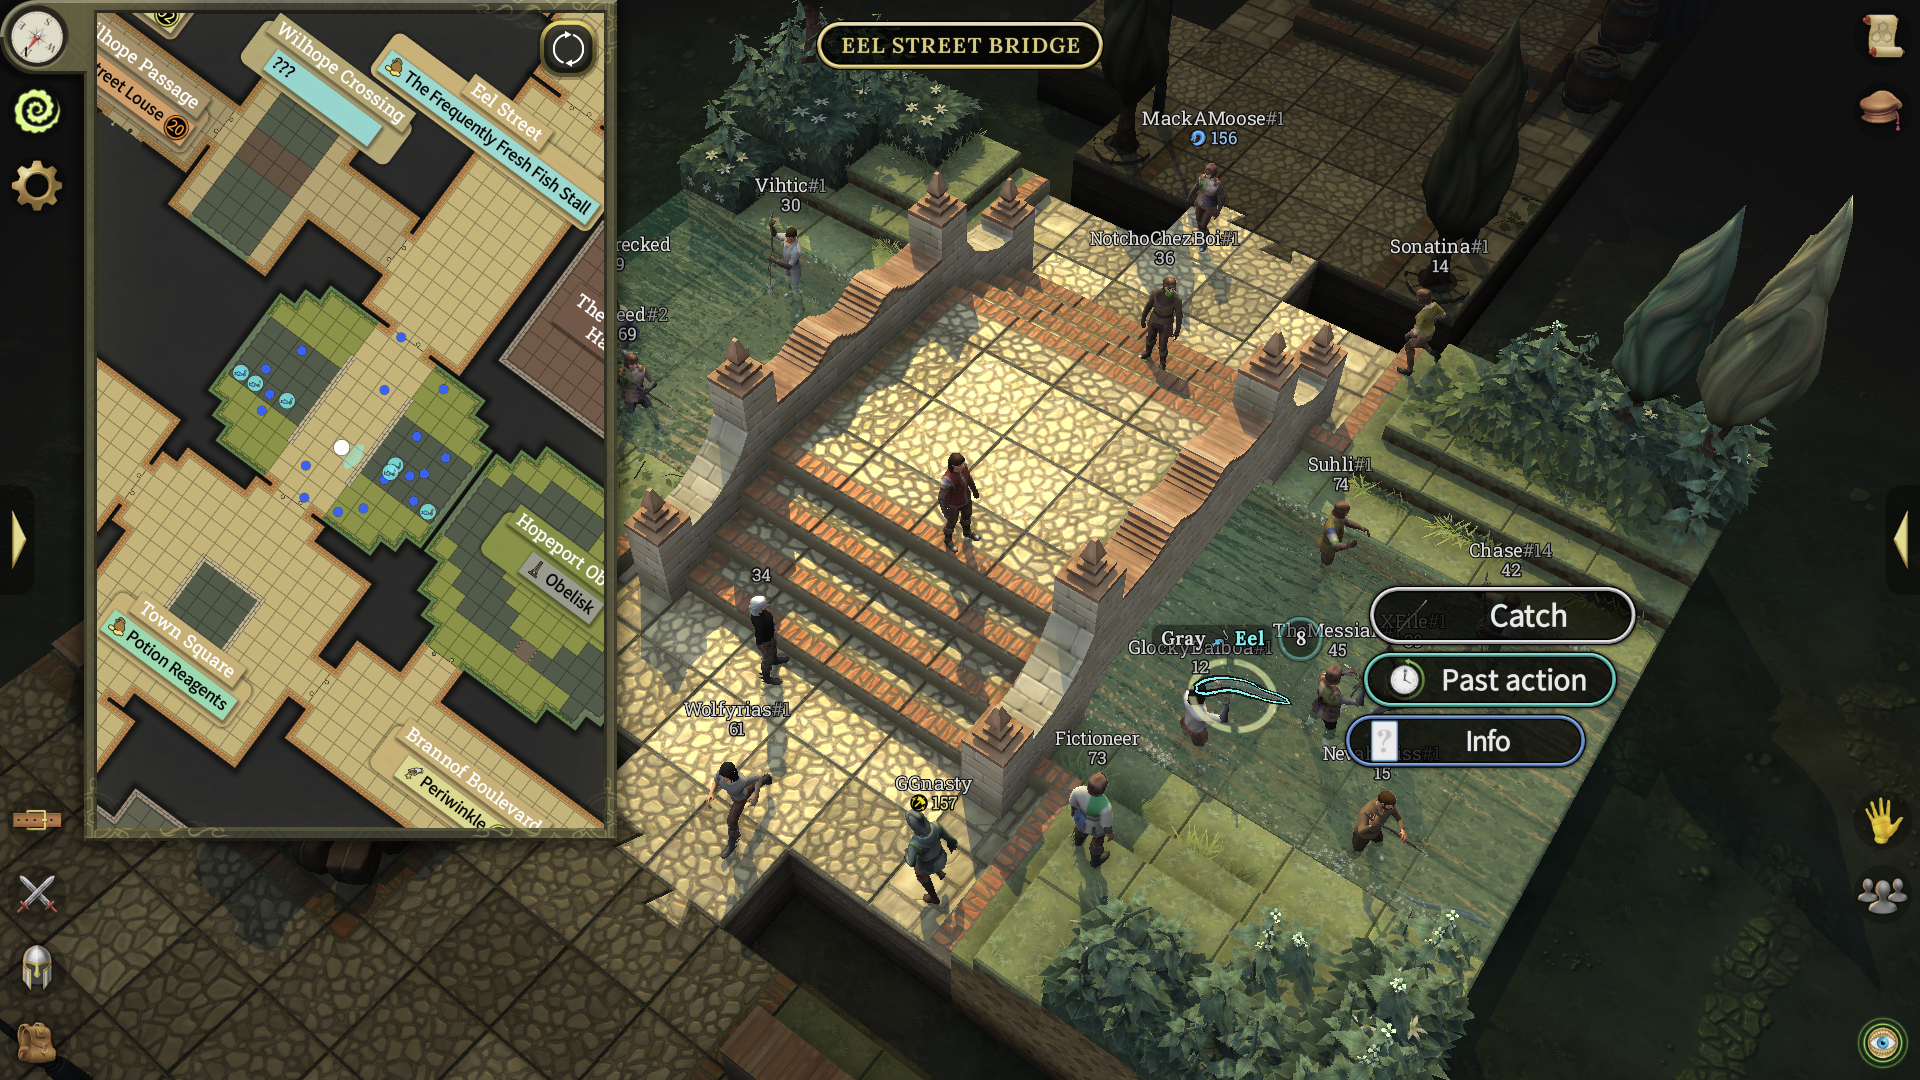
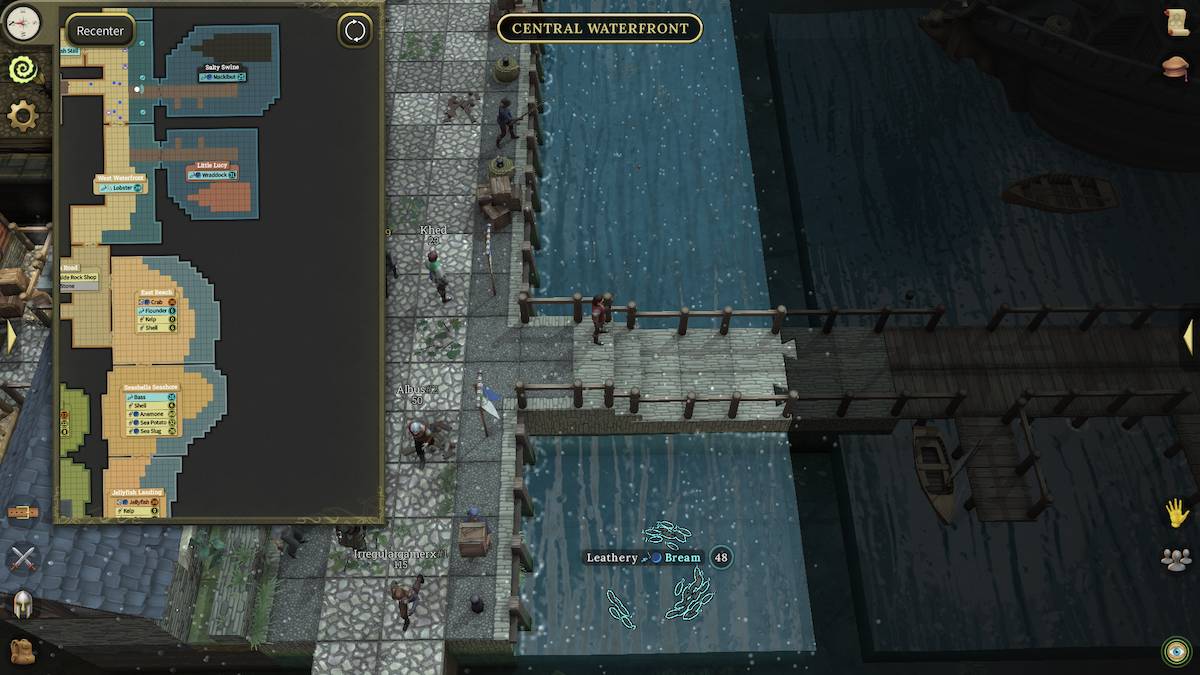
Seu local inicial de pesca deve ser o East Beach , onde você pode pegar o solha manchada para subir de 1 a 2. Depois disso, você pode dividir seu tempo entre East Beach e a Eel Street Bridge para subir de nível. As you progress, higher-level fish become available, so refer to the all fish table in this guide for specific catches and their locations. You can find the table at the end of the Fishing Profession section.
For players looking to maximize their efficiency, enchanting fishing tools can be a worthwhile investment. While costly, enchantments grant permanent XP bonuses when using a specific tool. This can be helpful for gaining XP in the long run, especially when combined with passive fishing strategies.
Para encantar seu equipamento, vá para a loja Enchantress (a área roxa no seu mapa), localizada em frente ao armazém da forrageira na Old Street East.
| Nível | Equipamento | Cost from Melv's Fishing Supplies | Enchanted Versions and Cost to Enchant |
|---|---|---|---|
| 0 | Fishing Spear | 12 Silver | V2: Level 15, 126 Silver V3: Level 43, 340 Silver V4: Level 113, 957 Silver V5: Level 173, 1 Gold 730 Silver V6: Level 310, 3 Gold 560 Silver |
| 20 | Haste de pesca | 72 Silver | V2: Level 66, 309 Silver V3: Level 116, 734 Silver V4: Level 157, 1 Gold 270 Silver V5: Level 205, 2 Gold 20 Silver V6: Level 363, 4 Gold 130 Silver |
| 28 | Cast Net | 86 Silver, 400 Copper | V2: Level 179, 716 Silver |
| 39 | Lobster Pot | 106 Silver | V2: Level 175, 1 Gold 50 Silver |
| 73 | Oyster Net | 334 Silver | V2: Level 231, 1 Gold 800 Silver |
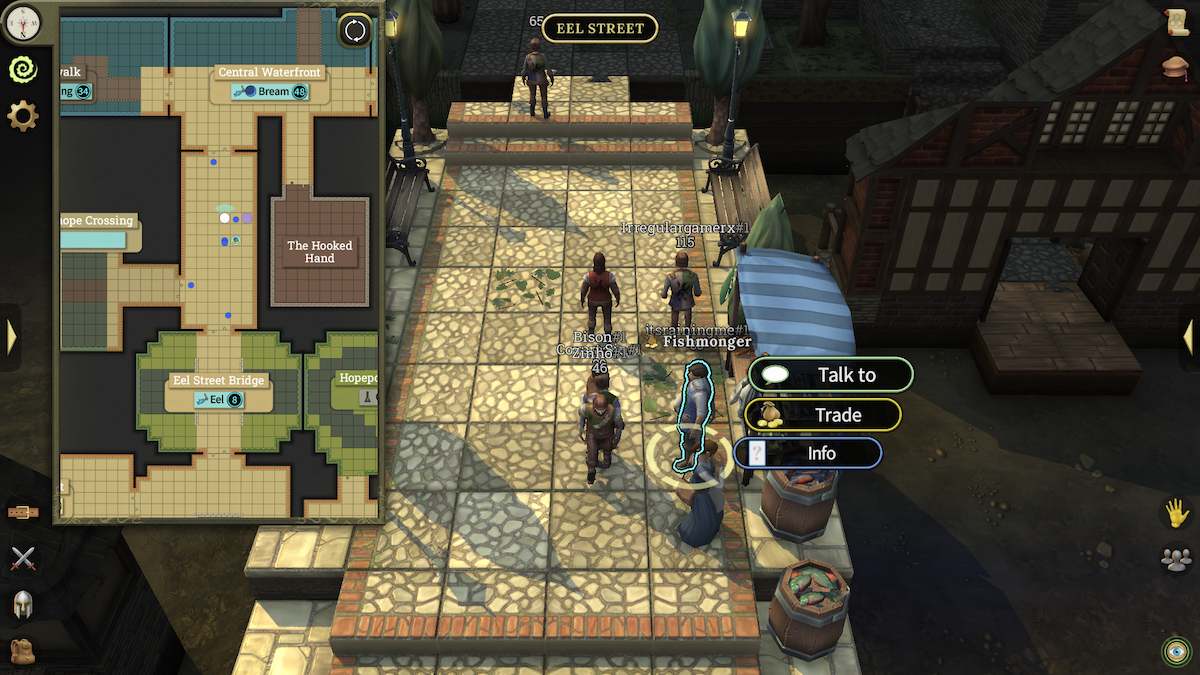
You can sell your fish at The Frequently Fresh Fish Stall on Eel Street , just before reaching the Central Waterfront. However, some fish are used in Chef recipes. Para descobrir se um peixe é um ingrediente, verifique a tabela no final da seção de profissão de chef ou na guia "Informações" em seu inventário. Ingredient fish can be stored in the Ingredients Bank located in the Delectable Dab Kitchen .
| Nível | Peixe | Localização | How to Catch |
|---|---|---|---|
| 0 | Mottled Flounder | East Beach | Fishing Spear |
| 2 | Lesser Eel | Eel Street Bridge | Fishing Spear |
| 4 | Sandy Pufferfish | Wilhope Crossing | Fishing Spear |
| 6 | Olive Flounder | East Beach | Fishing Spear |
| 8 | Gray Eel | Eel Street Bridge | Fishing Spear |
| 10 | Lonely Pufferfish | Wilhope Crossing | Fishing Spear |
| 12 | Stone Flounder | East Beach | Fishing Spear |
| 14 | Yellowtail Gurnard | Pirate Hideout | Fishing Spear |
| 16 | Rocky Eel | Eel Street Bridge | Fishing Spear |
| 18 | Lemon Pufferfish | Wilhope Crossing | Fishing Spear |
| 20 | Common Dab | Vacant Pier | Haste de pesca |
| 22 | Arrowtooth Flounder | East Beach | Fishing Spear |
| 25 | Spotted Mackibut | Salty Swine | Haste de pesca |
| 28 | Placid Bass | Seashells Seashore | Cast Net |
| 31 | Ballan Wraddock | Little Lucy | Haste de pesca |
| 34 | Ridged Herring | Boardwalk | Haste de pesca |
| 36 | Rord Eel | Eel Street Bridge | Fishing Spear |
| 39 | Orange lobster | West Waterfront | Lobster Pot |
| 42 | Figure Eight Pufferfish | Wilhope Crossing | Fishing Spear |
| 45 | Idle Sturlet | Salty Swine | Haste de pesca |
| 48 | Leathery Bream | Central Waterfront | Haste de pesca |
| 50 | Common Ray | Ray Bay | Haste de pesca |
| 53 | Small Dab | Vacant Pier | Haste de pesca |
| 56 | Bigeye Gurnard | Pirate Hideout | Fishing Spear |
| 59 | Whitespot Mackibut | Salty Swine | Haste de pesca |
| 62 | Flowery Flounder | East Beach | Fishing Spear |
| 65 | Goldsinny Wraddock | Little Lucy | Haste de pesca |
| 67 | Gray Herring | Boardwalk | Haste de pesca |
| 70 | Slight Cod | Starfish Point | Haste de pesca |
| 73 | Beach Oyster | East Waterfront | Oyster Net |
| 76 | Moray Eel | Eel Street Bridge | Fishing Spear |
| 79 | Flathead Sturlet | Vencível | Haste de pesca |
| 81 | Blue Jack Mackibut | Salty Swine | Haste de pesca |
| 84 | Striped Bass | Seashells Seashore | Cast Net |
| 87 | Black Bream | Central Waterfront | Haste de pesca |
| 90 | Dim Ray | Ray Bay | Haste de pesca |
| 93 | Dancing Dab | Vacant Pier | Haste de pesca |
| 95 | Striped Sturlet | Vencível | Haste de pesca |
| 98 | Pufferfish | Wilhope Crossing | Fishing Spear |
| 101 | Cuckoo Wraddock | Little Lucy | Haste de pesca |
| 104 | Waltzing Cod | Starfish Point | Haste de pesca |
| 107 | Striped Lobster | West Waterfront | Lobster Pot |
| 110 | Red Herring | Boardwalk | Haste de pesca |
| 112 | Blackfin Gurnard | Pirate Hideout | Fishing Spear |
| 115 | Streaked Mackibut | Salty Swine | Haste de pesca |
| 118 | Jelly Flounder | East Beach | Fishing Spear |
| 120 | Surf Bream | Central Waterfront | Haste de pesca |
| 123 | Soldier Ray | Ray Bay | Haste de pesca |
| 126 | Thick Lipped Sturlet | Vencível | Haste de pesca |
| 129 | Summer Dab | Vacant Pier | Haste de pesca |
| 131 | Conger Eel | Eel Street Bridge | Fishing Spear |
| 134 | Horse Mackibut | Salty Swine | Haste de pesca |
| 137 | Emerald Bass | Seashells Seashore | Cast Net |
| 140 | Signal Oyster | East Waterfront | Oyster Net |
| 142 | Cleaner Wraddock | Little Lucy | Haste de pesca |
| 145 | Teal Cod | Starfish Point | Haste de pesca |
| 148 | Ochre Herring | Boardwalk | Haste de pesca |
| 150 | Merry Old Pufferfish | Wilhope Crossing | Fishing Spear |
| 153 | Wandering Sturlet | Vencível | Haste de pesca |
| 156 | Chub Mackibut | Salty Swine | Haste de pesca |
| 159 | Nible Ray | Ray Bay | Haste de pesca |
| 161 | Smooth Dab | Vacant Pier | Haste de pesca |
| 164 | Shiny Gurnard | Pirate Hideout | Fishing Spear |
| 167 | Graceful Bream | Central Waterfront | Haste de pesca |
| 170 | Ornate Wraddock | Little Lucy | Haste de pesca |
| 172 | Peacock Flounder | East Beach | Fishing Spear |
| 175 | Ghost Lobster | West Waterfront | Lobster Pot |
| 178 | Pearly Cod | Starfish Point | Haste de pesca |
| 180 | Wishful Herring | Boardwalk | Haste de pesca |
| 183 | Silver Sturlet | Vencível | Haste de pesca |
| 186 | Leopard Eel | Eel Street Bridge | Fishing Spear |
| 189 | Blue Mackibut | Salty Swine | Haste de pesca |
| 191 | Dropthe Bass | Seashells Seashore | Cast Net |
| 194 | Cream Bream | Central Waterfront | Haste de pesca |
| 197 | Tiger Ray | Ray Bay | Haste de pesca |
| 200 | Western Sturlet | Vencível | Haste de pesca |
| 208 | Screaming Ab Dab | Vacant Pier | Haste de pesca |
| 217 | Hightide Pufferfish | Wilhope Crossing | Fishing Spear |
| 226 | Speckled Oyster | East Waterfront | Oyster Net |
| 235 | Mosaic Cod | Starfish Point | Haste de pesca |
| 243 | Six Line Wraddock | Little Lucy | Haste de pesca |
| 252 | Wahoo Mackibut | Salty Swine | Haste de pesca |
| 261 | Torpedo Gurnard | Pirate Hideout | Fishing Spear |
| 270 | Hope Herring | Boardwalk | Haste de pesca |
| 279 | Starry Flounder | East Beach | Fishing Spear |
| 287 | Blond Sturlet | Vencível | Haste de pesca |
| 296 | Gilt-Headed Bream | Central Waterfront | Haste de pesca |
| 305 | Broad Ray | Ray Bay | Haste de pesca |
| 314 | Spotted Dab | Vacant Pier | Haste de pesca |
| 323 | Greater Eel | Eel Street Bridge | Fishing Spear |
| 331 | Cunning Lobster | West Waterfront | Lobster Pot |
| 340 | Etway Mackibut | Salty Swine | Haste de pesca |
| 349 | Giant Bass | Seashells Seashore | Cast Net |
| 358 | Corkwing Wraddock | Little Lucy | Haste de pesca |
| 366 | Burly Cod | Starfish Point | Haste de pesca |
| 375 | Shimmering Herring | Boardwalk | Haste de pesca |
| 384 | Unicorn Pufferfish | Wilhope Crossing | Fishing Spear |
| 393 | Bullet Sturlet | Vencível | Haste de pesca |
| 402 | Brilliant Bream | Central Waterfront | Haste de pesca |
| 410 | Jade Ray | Ray Bay | Haste de pesca |
| 419 | King Mackibut | Salty Swine | Haste de pesca |
| 428 | Grand Gurnard | Pirate Hideout | Fishing Spear |
| 437 | Rusty Oyster | East Waterfront | Oyster Net |
| 446 | Mighty Dab | Vacant Pier | Haste de pesca |
| 454 | Emperor Cod | Starfish Point | Haste de pesca |
| 463 | Mega Wraddock | Little Lucy | Haste de pesca |
| 472 | Black Flounder | East Beach | Fishing Spear |
| 481 | Mighty Sturlet | Vencível | Haste de pesca |
| 490 | Prime Ray | Ray Bay | Haste de pesca |

A profissão de Forager em margens mais brilhantes é essencial para jogadores que desejam reunir itens que apóiam outras profissões como chef e alquimista. Forager allows you to collect various plants and ingredients necessary for crafting recipes and potions. Starting out, the first items you can forage are accessible simply by clicking on them and choosing "Forage." No entanto, à medida que avançar, você precisará de ferramentas especializadas para coletar itens de nível superior, que podem ser encontrados no armazém da Forager , localizado no lado nordeste de Hopeport.
For those looking to gain an edge, tools can be enchanted at the Enchantress Shop , located opposite the Forager's Warehouse. While these enchantments may only offer minor XP boosts, they can be helpful once you've accumulated enough funds to invest in them. À medida que você aumenta a profissão de Forager, você desbloqueia ingredientes de nível superior, que produzem mais XP e são cruciais para a elaboração de receitas avançadas nas profissões chef e alquimista.
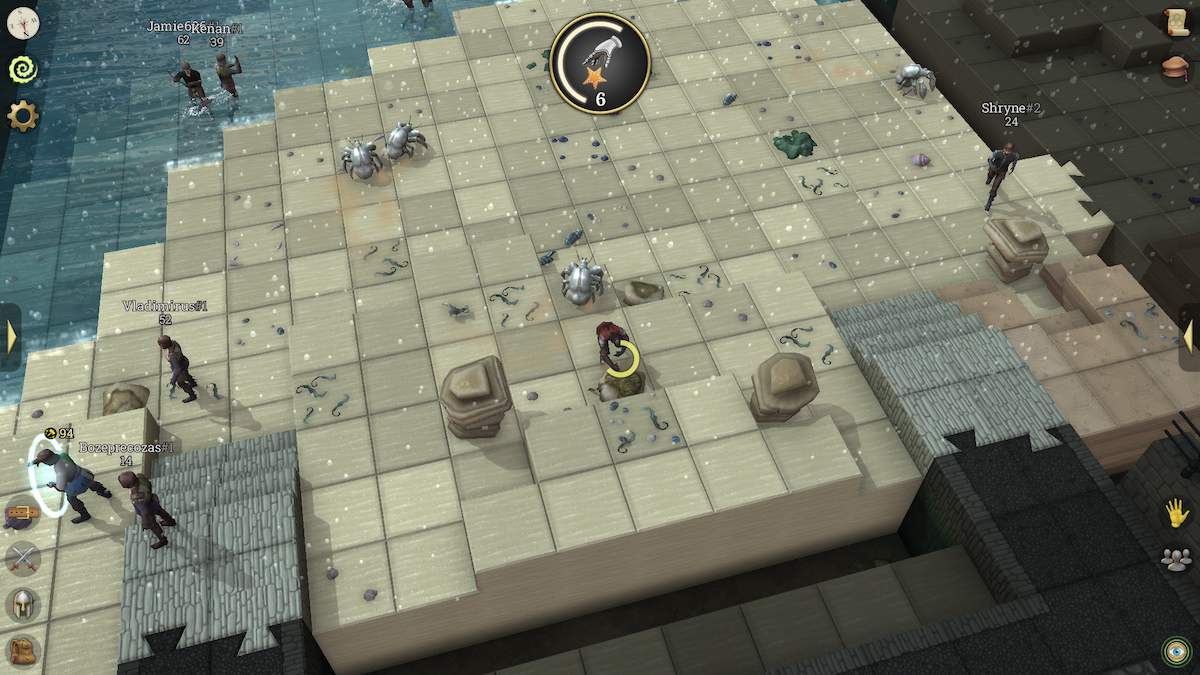
Leveling up the Forager Profession is all about consistency. The most effective strategy is to forage the highest-level items available to you. Items usually appear in clusters of three , so you can cycle around them to forage. For a more efficient grind, you can try using XP Hopeport potions, which you can craft yourself through the Alchemist Profession.
Each tool in the Forager Profession provides XP boosts, with higher-level tools offering more significant bonuses. To maximize your XP, ensure that you're using the highest-level tools your current Forager level permits. Your tools can be enchanted at the Enchantress Shop on Old Street East to add a permanent XP buff.
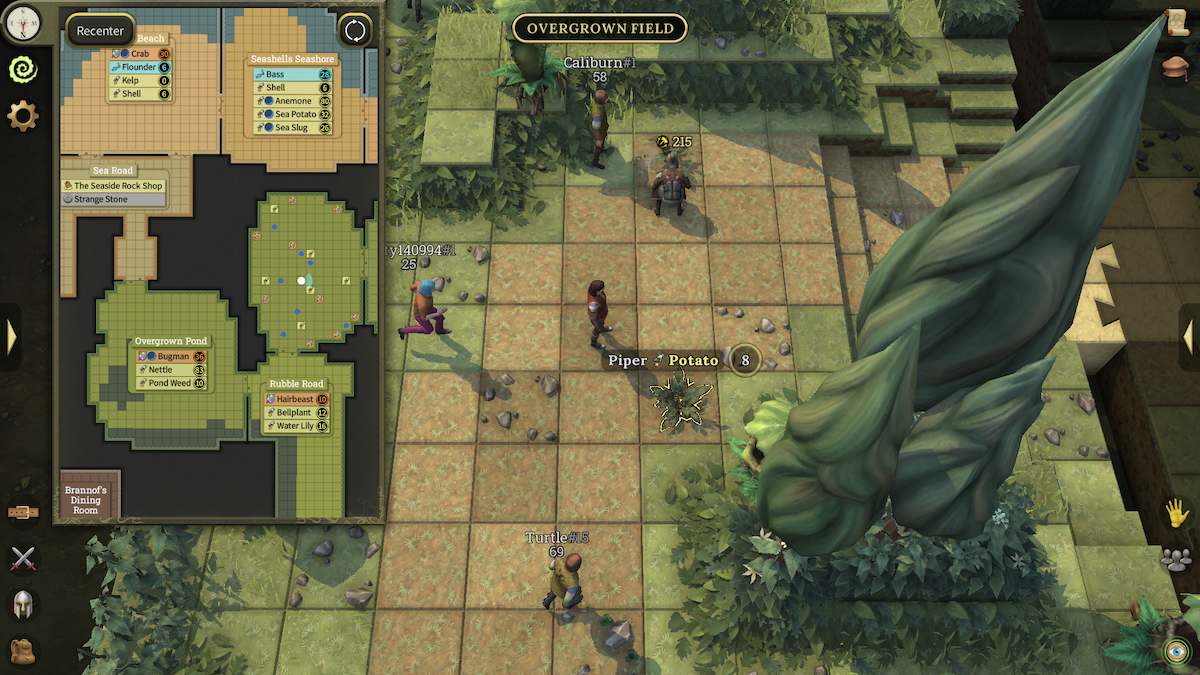
Foraging can be trained in many map locations over Hopeport. When looking at your map, check for yellow lables and you'll know that's an area you can forage in.
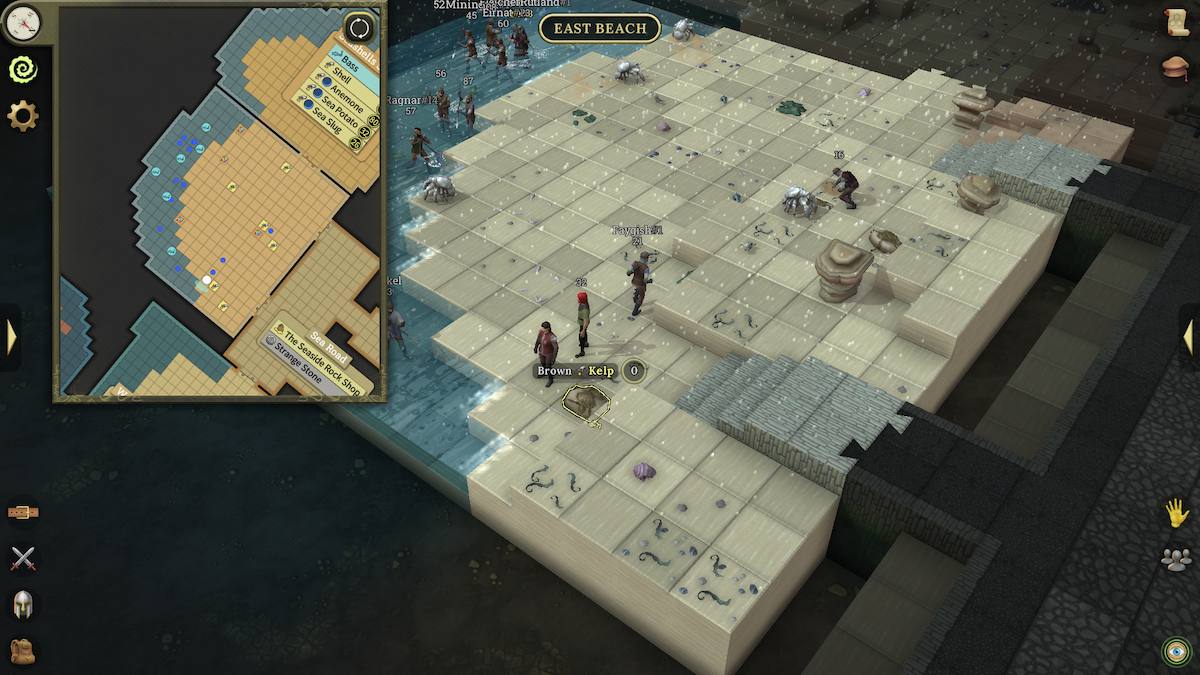
The Forager profession can be trained in plenty of places around Hopeport, but you'll want to start in East Beach or Jellyfish Landing . You can harvest Brown Kelp here until you reach level 2, then move on to Old Street East and Old Street West to gather Creamy Wallplant . You can also just stay in East Beach and gather Brown Kelp until level 6, when you can start picking up the Horn Shells in the same location. That's what I did.
After level 6, though, you'll have to move on. You can use the table at the end of this section to find out where all of the forgable items are in Hopeport.
These are all of the map locations for forage items :

O armazém da Forager , localizado no lado nordeste da cidade, é onde você pode comprar as ferramentas necessárias como Secates , uma espátula e uma rede de lagoas , bem como suas versões atualizadas. Quando você precisa de um impulso, a Enchantress Shop fica em frente ao armazém do Forager's e fornece encantamentos de ferramentas para buffs XP, aprimorando sua experiência de forrageamento.
The plants and items around Hopeport will scale as you level up, allowing you to revisit familiar areas for relevant foraging. This feature is beneficial for leveling other Professions too, as ingredients from the Forager Profession are often used in various recipes.
| Nível | Item | Localização |
|---|---|---|
| 0 | Brown Kelp | East Beach and Jellyfish Landing |
| 2 | Creamy Wallplant | Old Street East and Old Street West |
| 4 | White Periwinkle | Brannof Boulevard |
| 6 | Horn Shell | East Beach and Seashells Seashore |
| 8 | Piper Potato | Overgrown Field and Fallen Monument |
| 10 | Tangled Pond Weed | Overgrown Pond |
| 12 | Mauve Bellplant | Overgrown Field and Rubble Road |
| 14 | Huge Monument Piece | Crater and Wasteland |
| 16 | White Water Lily | Overgrown Field and Rubble Road |
| 18 | Wrinkled Starfish | Starfish Point and Jellyfish Landing |
| 20 | Gray Louse | Little Square |
| 23 | Hefty Monument Piece | Crater and Wasteland |
| 26 | Slippy Sea Slug | Seashells Seashore |
| 29 | Green Hogberries | Fallen Monument and Crater |
| 32 | Warty Sea Potato | Seashells Seashore |
| 35 | King Phelwan Potato | Overgrown Field and Fallen Monument |
| 38 | Blotchy Maggots | Collapsed Hovels |
| 41 | Common Limpet | Ray Bay and Pirate Hideout |
| 44 | Red and Black Feather | Collapsed Hovels |
| 47 | Green Kelp | East Beach and Jellyfish Landing |
| 50 | Bristle Spinseed | Little Square |
| 53 | Substantial Monument Piece | Crater and Wasteland |
| 56 | Rusty Scrap Metal | East Waterfront and Nook Alley |
| 59 | VIbrant Wallplant | Old Street West and Old Street East |
| 62 | Brown Moth Wing | Collapsed Hovels |
| 65 | Blue Periwinkle | Brannof Boulevard |
| 68 | Black Sea Slug | Seashells Seashore |
| 71 | Chunky Monument Piece | Crater and Wasteland |
| 74 | Soft Shimmerbean | Little Square |
| 77 | Bowl Shell | Seashells Seashore and East Beach |
| 80 | Beadlet Anemone | Seashells Seashore |
| 83 | White Nettle | Overgrown Road and Overgrown Pond |
| 86 | Tarnished Scrap Metal | East Waterfront and Nook Alley |
| 89 | Calystra Potato | Overgrown Field and Fallen Monument |
| 92 | Ditch Sprey | Little Square |
| 95 | Bladder Wrack | Starfish Point and Pirate Hideout |
| 98 | Reclusive Louse | Little Square |
| 101 | Reaching Pond Weed | Overgrown Pond |
| 104 | Pasty Maggots | Collapsed Hovels |
| 107 | Large Monument Piece | Crater, Wasteland |
| 110 | Blue Sea Potato | Seashells Seashore |
| 113 | Crimson Bellplant | Overgrown Field and Rubble Road |
| 116 | Twisted Scrap Metal | East Waterfront and Nook Alley |
| 119 | Big Monument Piece | Crater and Wasteland |
| 122 | White Fluffy Feather | Collapsed Hovels |
| 125 | Copper Water Lily | Overgrown Road and Rubble Road |
| 128 | Strawberry Anemone | Seashells Seashore |
| 131 | Clingy Starfish | Starfish Point and Jellyfish Landing |
| 134 | Brown Sea Slug | Seashells Seashore |
| 137 | Colawan Potato | Overgrown Field and Fallen Monument |
| 140 | Wing Spinseed | Little Square |
| 143 | Purple Hogberries | Fallen Monument and Crater |
| 146 | Icky Maggots | Collapsed Hovels |
| 149 | Tiger Limpet | Ray Bay and Pirate Hideout |
| 152 | Gravel Sprey | Little Square |
| 155 | Medium Monument Piece | Crater and Wasteland |
| 158 | Lacy Moth Wing | Collapsed Hovels |
| 161 | Silver Kelp | East Beach and Jellyfish Landing |
| 164 | Miscellaneous Scrap Metal | East Waterfront and Nook Alley |
| 167 | Scarlet Wallplant | Old Street West and Old Street East |
| 170 | Glow Shimmerbean | Little Square |
| 173 | Average Monument Piece | Crater and Wasteland |
| 176 | Gunky Sea Slug | Seashells Seashore |
| 179 | Striped Periwinkle | Brannof Boulevard |
| 182 | Dahlia Anemone | Seashells Seashore |
| 185 | Crown Shell | Seashells Seashore and East Beach |
| 188 | Shadow Louse | Little Square |
| 191 | Bitterbide Potato | Overgrown Field and Fallen Monument |
| 194 | Interesting Scrap Metal | East Waterfront and Nook Alley |
| 197 | Blood Nettle | Overgrown Road and Overgrown Pond |
| 200 | Balk Sprey | Little Square |
| 209 | Spiral Wrack | Starfish Point and Pirate Hideout |
| 218 | Rosy Maggots | Collapsed Hovels |
| 228 | Fair Monument Piece | Crater and Wasteland |
| 237 | Sleek Sea Potato | Seashells Seashore |
| 246 | Greenveil Pond Weed | Overgrown Pond |
| 256 | Shimmering Feather | Collapsed Hovels |
| 265 | Middling Monument Piece | Crater and Wasteland |
| 274 | Substantial Scrap Metal | East Waterfront and Nook Alley |
| 284 | Starshine Bellplant | Overgrown Field and Rubble Road |
| 293 | Whirl Spinseed | Little Square |
| 302 | Broad Water Lily | Overgrown Road and Rubble Road |
| 312 | Eyed Moth Wing | Collapsed Hovels |
| 321 | Greengrail Potato | Overgrown Field and Fallen Monument |
| 330 | Juicy Sea Slug | Seashells Seashore |
| 340 | Beaded Starfish | Starfish Point and Jellyfish Landing |
| 349 | Snakelocks Anemone | Seashells Seashore |
| 359 | Red Hogberries | Fallen Monument and Crater |
| 368 | Writhing Maggots | Collapsed Hovels |
| 377 | Small Monument Piece | Crater and Wasteland |
| 387 | Dazzle Shimmerbean | Little Square |
| 396 | Irongrip Limpet | Ray Bay and Pirate Hideout |
| 405 | Sentinel Sprey | Little Square |
| 415 | Weeny Monument Piece | Crater and Wasteland |
| 424 | Splendid Scrap Metal | East Waterfront and Nook Alley |
| 433 | Galimeer Potato | Overgrown Field and Fallen Monument |
| 443 | Elegant Anemone | Seashells Seashore |
| 452 | Teeny Monument Piece | Crater and Wasteland |
| 461 | Valuable Scrap Metal | East Waterfront and Nook Alley |
| 471 | Minute Monument Piece | Crater and Wasteland |
| 480 | Duke Sprey | Little Square |
| 490 | Miniscule Monument Piece | Crater and Wasteland |
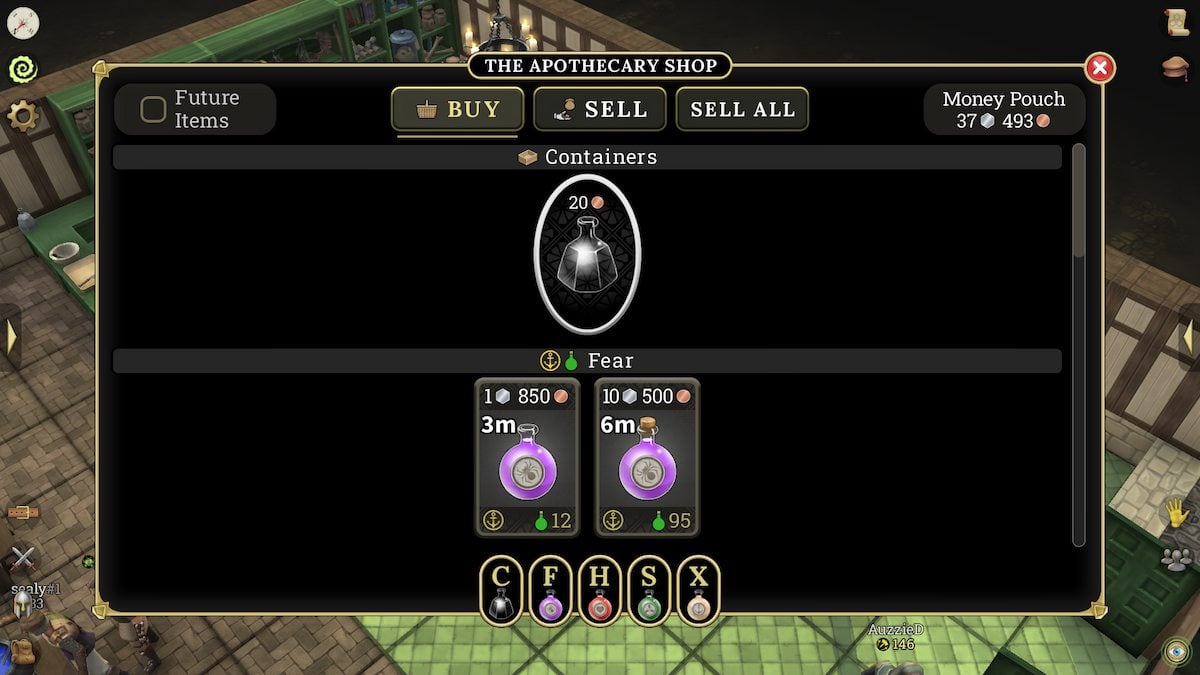
In Brighter Shores, the Alchemist Profession allows players to craft potions that heal or provide temporary buffs, making it a valuable skill to develop. To begin training as an Alchemist, head to the Apothecary , where you can create your first potion. This requires bottles , which can be purchased from Ebsworth for 20 Copper each, as well as ingredients that you can gather or obtain through rare enemy drops. Bottles are stored in your Toolbelt, so they won't take up space in your main inventory.
As you progress and increase your Alchemist level, you'll unlock the ability to create stronger and more varied potions. Potions, apart from the basic Healing Potion, need two different ingredients, and higher-level potions will require more advanced materials so that you can make them.
Although ingredients are typically gathered through foraging, they can also be bought from Zeltay Tramagan in Hopeport Town Square for a high price or rarely dropped by enemies. For added convenience, spare potions and ingredients can be stored in the Apothecary's bank, but remember that ingredients need to be in your inventory to craft potions.
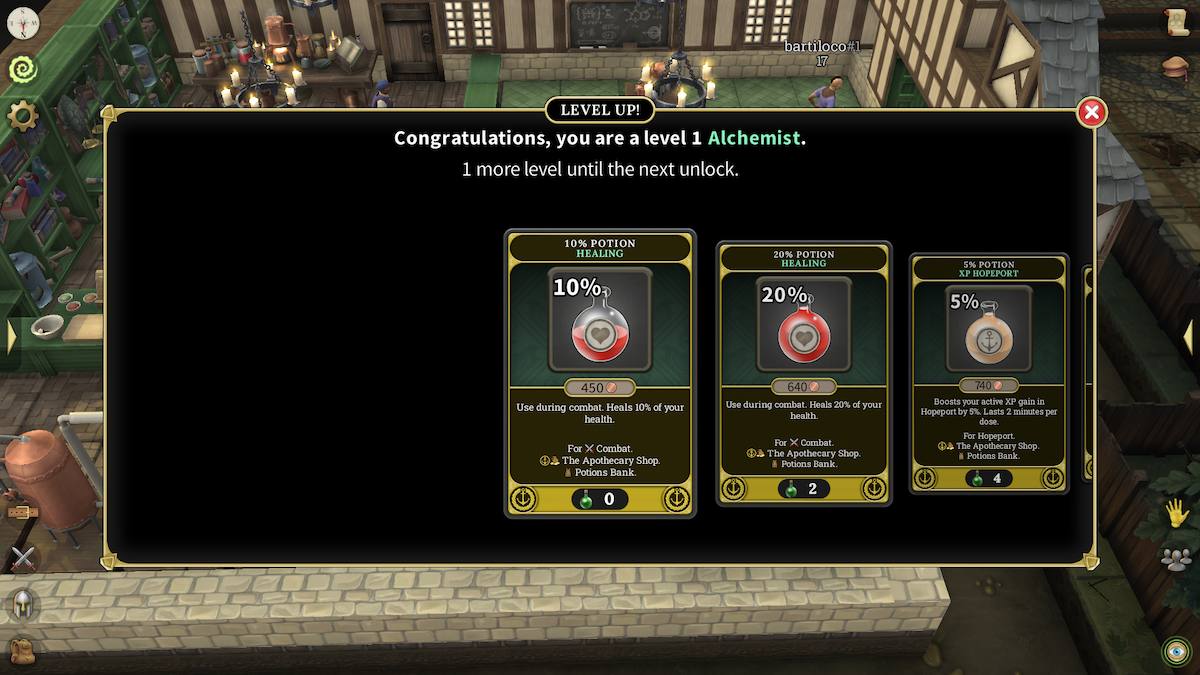
To level up the Alchemist Profession, the best thing you can do is start by crafting XP Hopeport potions . These potions not only help you gain Alchemist XP but are also useful for boosting other Professions in Hopeport. If XP potions are not an option, focus on making the highest-level potions available to you , which will require you to level up your Professions simultaneously to maintain a steady supply of ingredients.
Each potion crafted requires two ingredients, so you can produce batches of 12 potions at a time to maximize efficiency. Keep in mind that using higher-level ingredients when crafting mixed-level potions ensures that the process goes smoothly. When you're doing this, place the ingredient with the highest level on the Reagent Preparation Station first.
Alchemy should be trained alongside your Foraging Profession because they go hand-in-hand. You can't make potions without foraged ingredients.
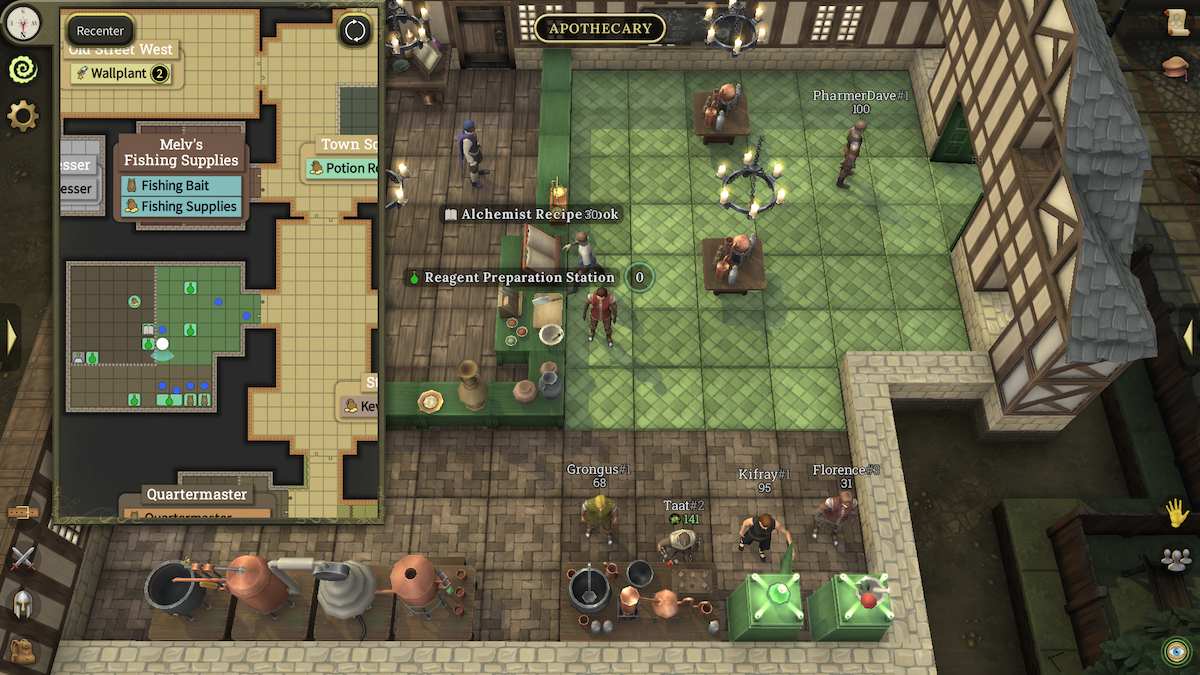
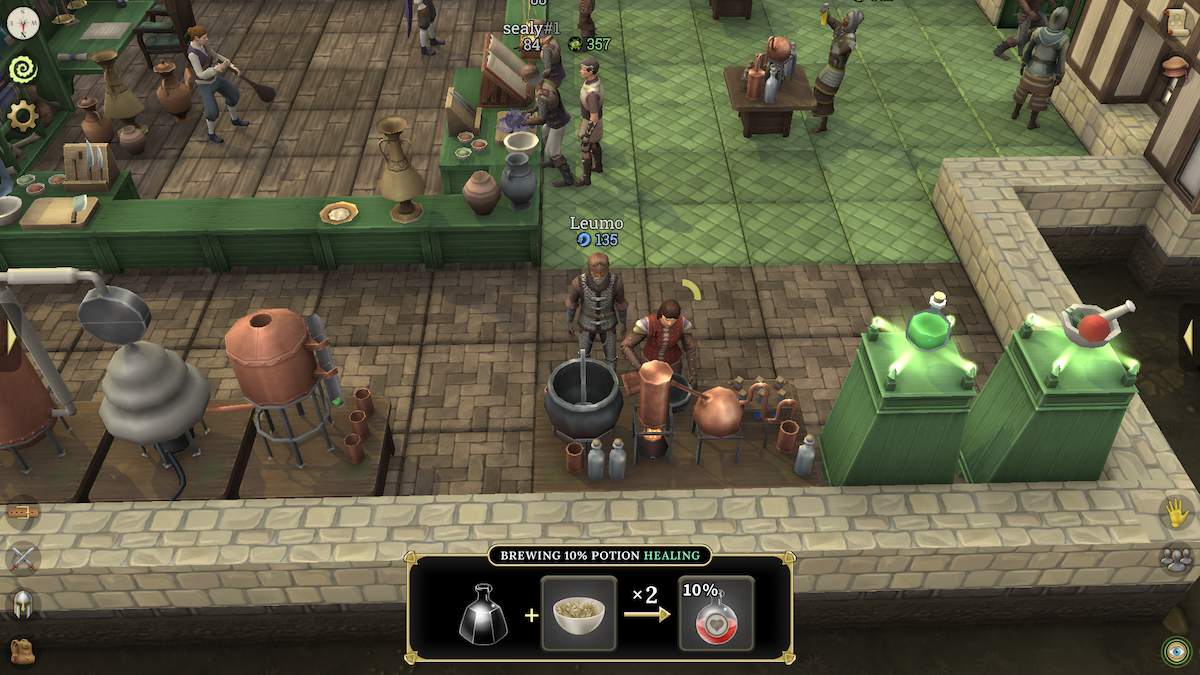
Potion crafting takes place in the Apothecary , which is located off Stone Street , just south of the Guard HQ in Hopeport. Within the Apothecary, there are separate crafting stations for preparing reagents and finalizing potions. The general workflow involves gathering materials through the Forager Profession, processing them into prepared reagents at the station, and then crafting the potions.
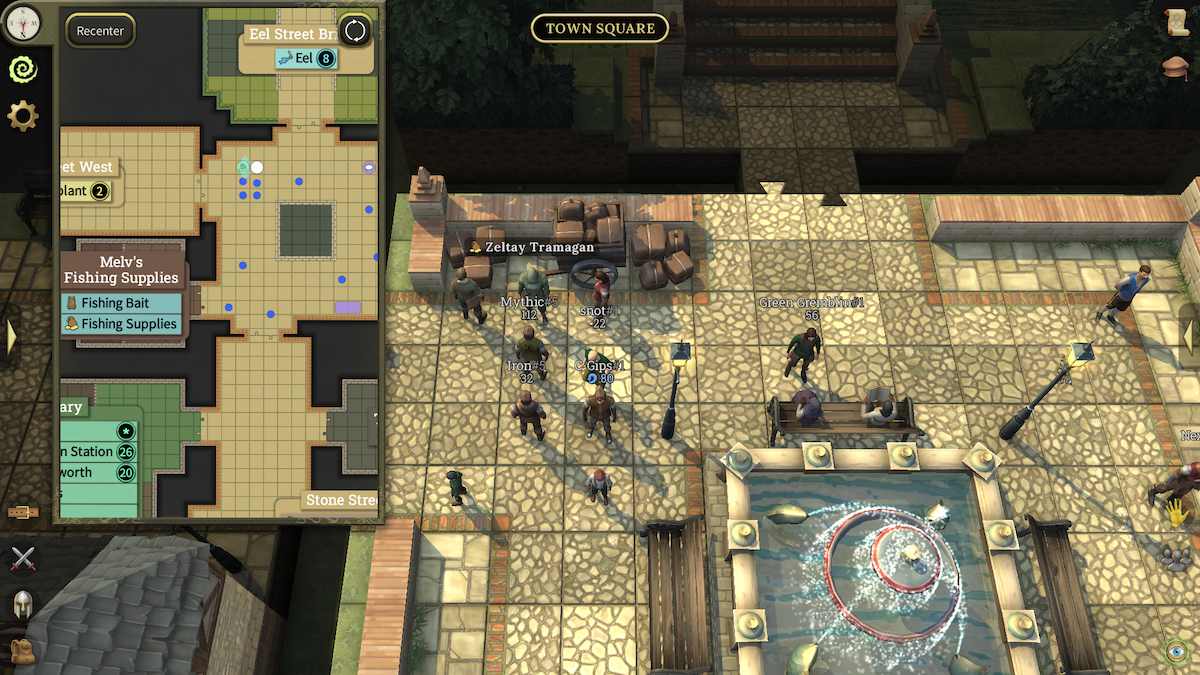
For those who wish to increase their XP gain at the cost of coins, ingredients for unlocked potions can be bought from the Potion Reagent Vendor , who can be found in the southeast corner of the Town Square . This option is helpful when time is a priority or when you want to focus on rapid XP gains.
If you want to forage your ingredients, refer to the foraging table at the end of the Foraging Profession section. You'll find every item you can forage in Hopeport, and the level you need to be to do so.
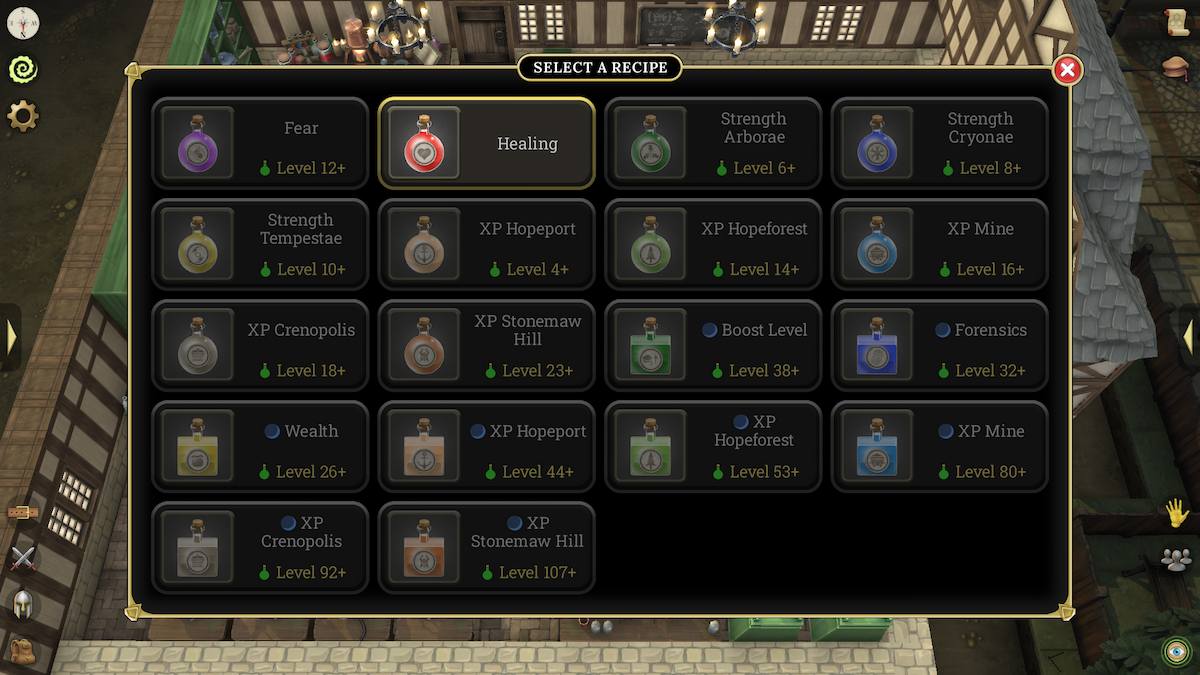
The table below only includes one of the many passive potions you can create. This list focuses on the potions you can unlock and manually create as you level up, rather than those you can do while you're offline.
| Nível | Potion Strength | Potion Type | Ingredientes |
|---|---|---|---|
| 0 | 10% Potion | Cura | Brown Kelp |
| 2 | 20% Potion | Cura | Brown Kelp,Creamy Wallplant |
| 4 | 5% Potion | XP Hopeport | White Periwinkle,Horn Shell |
| 6 | +40 Potion | Strength Arborae | Tangled Pond Weed, Mauve Bellplant |
| 8 | +40 Potion | Strength Cryonae | White Water Lily,Wrinkled Starfish |
| 10 | +40 Potion | Strength Tempestae | Green Hogberries,Common Limpet |
| 12 | 3 Minute Potion | Temer | Dandelion,Globeplant |
| 14 | 5% Potion | XP Hopeport | Bulged Haleberries,Tad Apple |
| 16 | 5% Potion | XP Mine | Dull Metallic Tooth,Crumbly Rock Scale |
| 18 | 5% Potion | XP Crenopolis | Plain White Pearl,Summerview Grapes |
| 23 | 5% Potion | XP Stonemaw Hill | Meat Worm,Stonemaw Toadstool |
| 26 | 250% Potion | Fortuna | Gray Louse,Warty Sea Potato |
| 29 | 25% Potion | Cura | Green Kelp, Vibrant Wallplant |
| 32 | Basic Potion | Forensics | Red and Black Feather, Bristle Spinseed |
| 35 | 28% Potent Potion | Cura | Gritty Mine Dust, Grey Tongue of Minecrawler |
| 38 | +1 Potion | Boost Level | Soft Shimmerbean, Brown Moth Wing |
| 41 | 6% Potion | XP Hopeport | Blue Periwinkle, Bowl Shell |
| 44 | 5% Potion | XP Hopeport (V2) | Beadlet Anemone, Ditch Sprey |
| 50 | 7% Potent Potion | XP Hopeport | Bladder Wrack, White Nettle |
| 50 | Hair Restoration Potion | Used for The Brannof Inheritance quest | Hair Beast Hair, Scrap Rat |
| 53 | 5% Potion | XP Hopeforest (V2) | Strangle Shoot, Slothful Bug |
| 56 | +50 Potion | Strength Arborae | Reaching Pond Weed, Crimson Bellplant |
| 59 | 300% Potion | Fortuna | Samuel's Lichen, Blue Aboredon Egg |
| 62 | +60 Potent Potion | Strength Arborae | Dewkin Chestnut, Bristled Catkin |
| 65 | Moderate Potion | Forensics | Salt Beetle, Jaleg Stalks |
| 68 | +50 Potion | Strength Cryonae | Copper Water Lily, Clingy Starfish |
| 71 | +2 Potion | Boost Level | Bitter Acorn, Rundersham Hazelnut |
| 77 | +60 Potent Potion | Strength Cryonae | Scepter Thistle, White Clover |
| 80 | 5% Potion | XP Mine (V2) | Tatty Wing of Bat, Chipped Beastman Claws |
| 83 | +50 Potion | Strength Tempestae | Purple Hogberries, Tiger Limpet |
| 86 | 6% Potion | XP Hopeport (V2) | Strawberry Anemone, Gravel Sprey |
| 89 | +60 Potent Potion | Strength Tempestae | Purple Orchid, Flat Snake Scale |
| 92 | 5% Potion | XP Crenopolis (V2) | Green Olives, Red Earth Spice |
| 95 | 6 Minute Potion | Temer | Violet Globeplant, Sunshine Dandelion |
| 98 | 6% Potion | XP Hopeforest (V2) | Brush Shoot, Lowburrow Bug |
| 104 | 9 Minute Potent Potion | Temer | Squishy Toad's Eye, Glutinous Sucker |
| 107 | 5% Potion | XP Stonemaw Hill (V2) | Gray Cave Moss, Small Pinecone |
| 110 | 6% Potion | XP Hopeforest | Blue Haleberries, Myrtle Apple |
| 113 | 6% Potion | XP Mine (V2) | Patched Wing of Bat, Shaggy Beastman Claws |
| 116 | 7% Potent Potion | XP Hopeforest | Hairy Dock Leaf, Glade Sage |
| 119 | 6% Potion | XP Crenopolis (V2) | Salty Olives, Tangizest Spice |
| 122 | 6% Potion | XP Mine | Jagged Metallic Tooth, Smooth Rock Scale |
| 125 | 250% Potion | Fortuna | Reclusive Louse, Blue Sea Potato |
| 131 | 7% Potent Potion | XP Mine | Brittle Cockroach Mandible, Gelatinous Slime |
| 134 | Fine Potion | Forensics | White Fluffy Feather, Wing Spinseed |
| 137 | 6% Potion | XP Crenopolis | Ivory Swirl Pearl, Blacksour Grapes |
| 140 | +3 Potion | Boost Level | Glow Shimmerbean, Lacy Moth Wing |
| 143 | 7% Potent Potion | XP Crenopolis | Red Cabbage, Klamit Cinnamon Sticks |
| 146 | 6% Potion | XP Stonemaw Hill (V2) | Brown Cave Moss, Medium Pinecone |
| 149 | 6% Potion | XP Stonemaw Hill | Spice Worm, Cave Toadstool |
| 152 | 7% Potion | XP Hopeport (V2) | Dahlia Anemone, Balk Sprey |
| 158 | 7% Potent Potion | XP Stonemaw Hill | Orange Centipede, Scraggle Creeper |
| 161 | 7% Potion | XP Hopeforest (V2) | Stout Shoot, Pine Bug |
| 164 | 32% Potion Healing | Cura | Silver Kelp, Scarlet Wallplant |
| 187 | 7% Potion | XP Mine (V2) | Disfigured Wing of Bat, Yellowing Beastman Claws |
| 170 | 35% Potion Healing | Cura | Fine Mine Dust, Green Tongue of Minecrawler |
| 173 | 7% Potion | XP Crenopolis (V2) | Brown Olives, Western Isle Spice |
| 176 | 8% Potion | XP Hopeport | Striped Periwinkle, Crown Shell |
| 179 | 7% Potion | XP Stonemaw Hill (V2) | Yellow Cave Moss, Great Pinecone |
| 185 | 10% Potent Potion | XP Hopeport | Spiral Wrack, Blood Nettle |
| 188 | 400% Potion | Fortuna | Patch Lichen, Stoneshell Aboredon Egg |
| 191 | +70 Potion | Strength Arborea | Greenveil Pond Weed, Starshine Bellplant |
| 194 | Strong Potion | Forensics | Star Beetle, Kalinger Stalks |
| 197 | +80 Potent Potion | Strength Arborea | Lowbranch Chestnut, Fuzzy Catkin |
| 200 | +4 Potion | Boost Level | Sweet Acord, Tigershell Hazelnut |
| 209 | 12 Minute Potion | Temer | Brilliant Globeplant, Streaky Dandelion |
| 219 | 8% Potion | XP Hopeport (V2) | Snakelocks Anemone, Sentinel Sprey |
| 238 | 15 Minute Potent Potion | Temer | Bright Toad's Eye, Sucky Sucker |
| 248 | 8% Potion | XP Hopeforest (V2) | Strong Shoot, Blood Bug |
| 258 | +70 Potion | Strength Cryonae | Broad Water Lily, Beaded Starfish |
| 267 | 8% Potion | XP Mine (V2) | Sleek Wing of Bat, Thick Beastman Claws |
| 277 | +80 Potent Potion | Strength Cryonae | Beacon Thistle, Red Clover |
| 287 | 8% Potion | XP Crenopolis (V2) | Black Olives, Merridark Spice |
| 296 | +70 Potion | Strength Tempestae | Red Hogberries, Irongrip Limpet |
| 306 | 8% Potion | XP Stonemaw Hill (V2) | Green Cave Moss, Broadscale Pinecone |
| 325 | +80 Potent Potion | Strength Tempestae | Butterfly Orchid, Patterned Snake Scale |
| 335 | 450% Potion | Fortuna | Shadow Louse, Sleek Sea Potato |
| 344 | 8% Potion | XP Hopeforest | Ridged Haleberries, Golden Scrumptious Apple |
| 354 | Superior Potion | Forensics | Shimmering Feather, Whirl Spinseed |
| 364 | 10% Potent Potion | XP Hopeforest | Speckled Dock Leaf, Mighthelm Sage |
| 373 | +5 Potion | Boost Level | Dazzle Shimmerbean, Eyed Moth Wing |
| 383 | 8% Potion | XP Mine | Sharp Metallic Tooth, Glossy Rock Scale |
| 393 | 10% Potion | XP Hopeport (V2) | Elegant Anemono, Duke Sprey |
| 412 | 10% Potent Potion | XP Mine | Hardened Cockroach Mandible, Slimy Slime |
| 422 | 10% Potion | XP Hopeforest (V2) | Mist Shoot, Sour Bug |
| 431 | 8% Potion | XP Crenopolis | Blue Dazzling Pearl, Wrath Grapes |
| 441 | 10% Potion | XP Mine (V2) | Hairy Wing of Bat, Heavy Beastman Claws |
| 451 | 10% Potent Potion | XP Crenopolis | Napa Cabbage, Vorshalt Cinnamon Sticks |
| 460 | 10% Potion | XP Crenopolis (V2) | Royal Olives, Orange Blaze Spice |
| 470 | 8% Potion | XP Stonemaw Hill | Crunch Worm, Demoncap Toadstool |
| 480 | 10% Potion | XP Stonemaw Hill (V2) | Dark Cave Moss, Magnificent Pinecone |
| 490 | 10% Potent Potion | XP Stonemaw Hill | Scuttling Centipede, Granite Creeper |
Looking for more Brighter Shores guides at Pro Game Guides? Check out What do the red and green arrows mean in Brighter Shores?